
Your Mac has probably trained you to trust Time Machine. You plug in a drive, see the reassuring progress bar, and assume you're covered. For day-to-day mishaps, that confidence is often justified.
The trouble starts years later. You restore an old file, the restore works, and then the file itself won't open properly on your current Mac or in your current app. That's the part most Time Machine advice skips over. A backup can be complete and still fail the one test that matters, which is whether you can successfully use what you restored.
Table of Contents
- Why a Backup Is More Than Just a Copy
- Setting Up Your First Time Machine Backup
- Managing and Optimizing Your Backups
- How to Restore Data from a Time Machine Backup
- Advanced Backup Strategies and Best Practices
- Troubleshooting Issues and When to Call Nerds 2 You
Why a Backup Is More Than Just a Copy
A proper backup protects more than files. It protects usable work, family photos you can still open, old tax records you can still read, and project archives that still make sense on a newer Mac.
One of the biggest blind spots is the usability gap. A file can exist safely inside a Time Machine archive and still be useless if the app that created it has changed too much, dropped support, or now handles that format differently. Creative professionals run into this with editing projects. Small businesses see it with legacy bookkeeping exports, old templates, and custom databases.
That risk is more common than many Mac users realise. A 2026 survey found that 68% of long-term Mac users could not confidently confirm backward compatibility of their archived files, and a 2025 audit of Edmonton-area firms found that 22% of small business Mac users lost access to legacy project files after macOS upgrades according to the cited discussion of archival compatibility concerns.
Practical rule: A backup isn't finished when the file is copied. It's finished when the file opens and works.
Time Machine still matters. It's one of the best first lines of defence built into macOS because it keeps versions, restores deleted files easily, and can help rebuild a Mac after hardware trouble or migration to a new machine. For most households, it's the backup system they're most likely to use consistently, which counts for a lot.
But consistent isn't the same as complete. If you want a backup plan that holds up over the long term, you need two habits. First, back up regularly. Second, test whether your older files are still usable in the software you rely on now. That second step is where many people discover the difference between file recovery and actual business continuity.
If you're reviewing your own plan, start with a clear look at your data backup options for home and business Macs. The right setup depends less on menus in macOS and more on which files would hurt the most to lose, and which ones might become difficult to open later.
Setting Up Your First Time Machine Backup
Getting your first Time Machine backup right is mostly about making a few good choices at the start. The drive matters. Encryption matters. The connection type matters. Once those are sorted out, macOS does most of the routine work for you.
Choose the drive before you click anything
For a first backup, many users are deciding between an external HDD and an external SSD.
An HDD usually makes sense if your priority is storing a lot of history for less money. It's slower, but for a Mac that mostly sits at a desk and backs up overnight, that may be fine. An SSD is faster, quieter, and more pleasant to live with, especially if you connect and disconnect it often.
A few practical points help:
- Pick a drive you'll keep connected: The best backup drive is the one that gets used regularly, not the one with the most impressive box.
- Think about portability: If the drive travels in a bag with a MacBook, choose something physically sturdy and easy to reconnect.
- Match the drive to your workload: A household Mac full of documents and photos behaves differently from a Mac running virtual machines, Xcode, or large media libraries.
If you're still deciding, this guide to the best external hard drive for backup helps narrow down what fits a home setup versus a heavier work setup.
Set it up properly in macOS
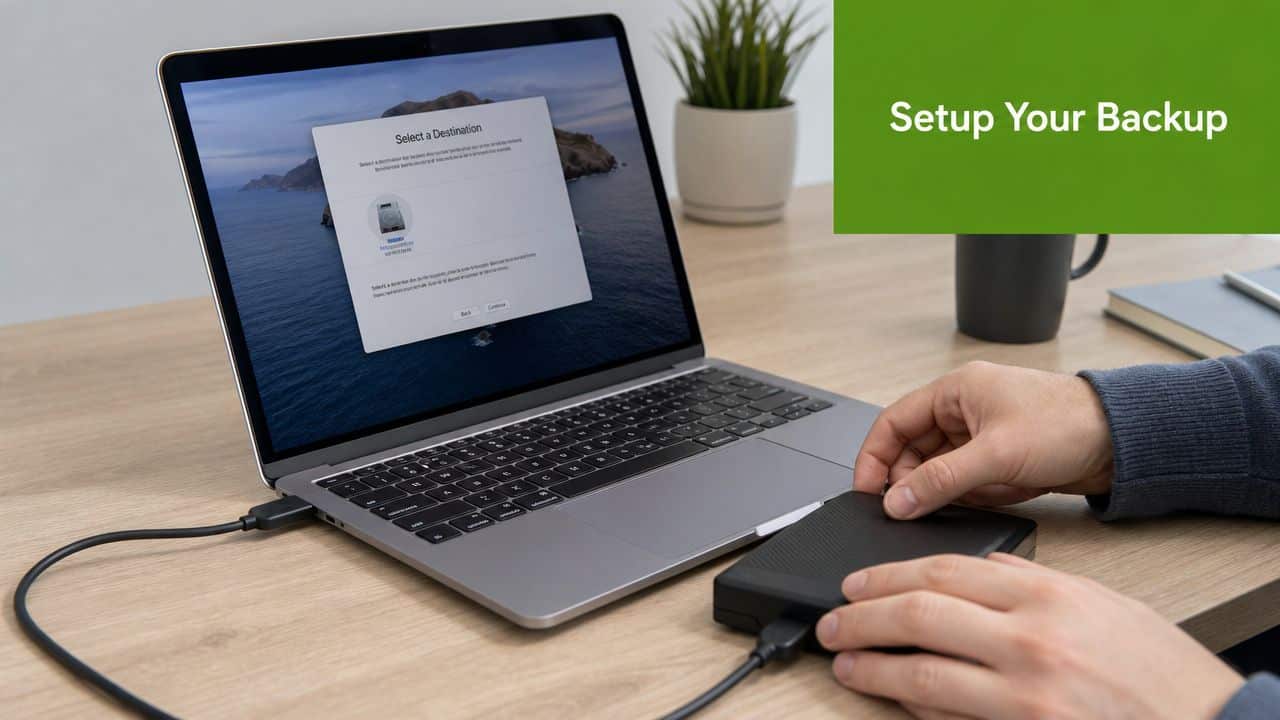
Once you have the drive, connect it directly to the Mac. If the drive is brand new, macOS may ask whether you want to use it for Time Machine. If it doesn't, open System Settings, go to General, then Time Machine, and add the disk there.
If the drive needs to be prepared first, use Disk Utility. Select the external drive, erase it if needed, and format it with a macOS-compatible file system that Time Machine supports on your version of macOS. If you're unsure which volume is the correct one, stop and double-check before erasing anything.
Use this sequence:
- Connect the drive directly to the Mac. Avoid adding extra adapters if you don't need them.
- Open Time Machine settings and choose the disk. This tells macOS where to store versioned backups.
- Enable encryption before the first backup starts. That protects your data if the drive is lost or stolen.
- Let the first backup finish without interruption. The initial run often takes the longest because everything has to be copied.
Encrypt the backup at the beginning. Turning that on later is more awkward than doing it correctly on day one.
Encryption is the step many people skip because they want to get the first backup moving. Don't skip it. A backup drive often contains years of personal data, browser information, saved documents, and exported records. If that drive leaves your home or office, you want the contents protected.
The first backup can take a while, especially on older drives or busy Macs. That doesn't always mean something is wrong. During that first run, keep the Mac awake, keep the drive connected, and avoid moving large files around unless you have to. Once the base backup is built, later runs are usually far less disruptive.
Managing and Optimizing Your Backups
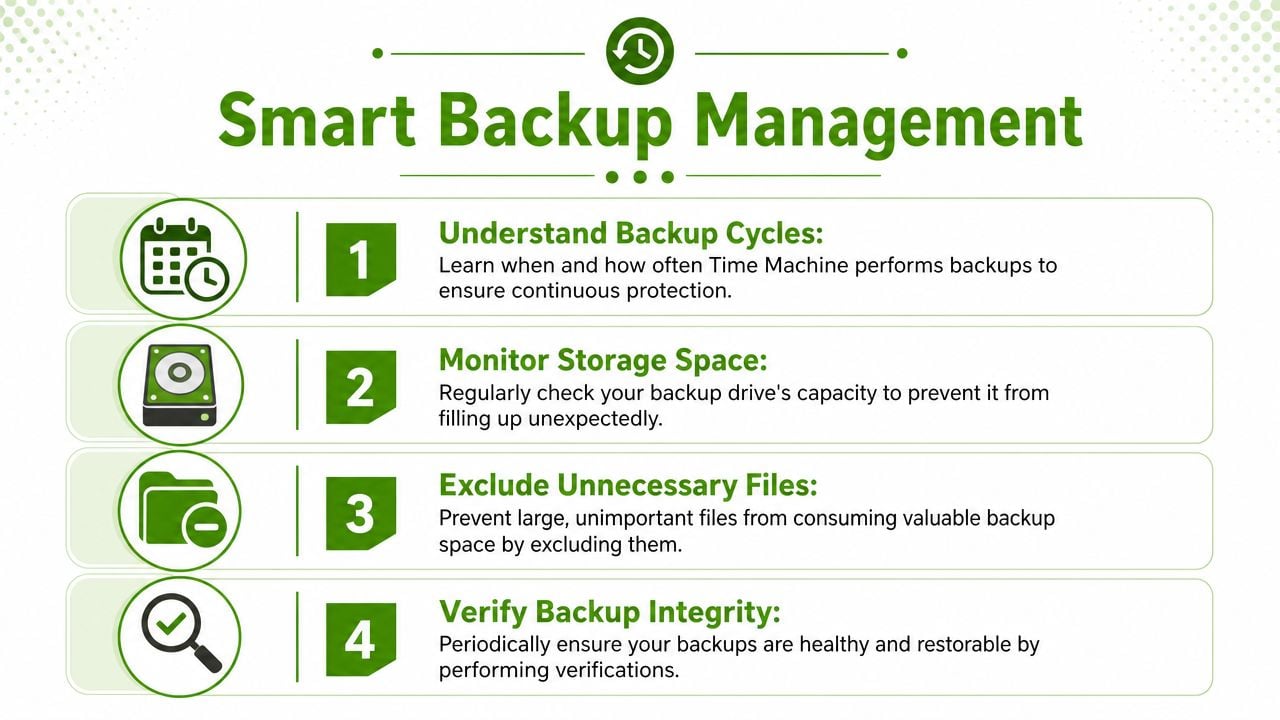
A lot of people think Time Machine should only back up what they touched that day. In practice, it often doesn't behave that neatly. macOS tracks file changes at a deeper level, so backup size can jump even when your own work barely changed.
Why backup sizes can look wrong
If a Time Machine backup suddenly writes far more data than expected, large container-style files are often the reason. Time Machine can write 25 GB or more in a single cycle, even with minimal user changes, because it re-backs up large files like virtual machines or email databases if any small change occurs according to Apple Community reports describing oversized incremental backups.
That's why someone edits a few emails, starts one virtual machine, or lets an app update its internal database, and then sees a surprisingly large backup. Time Machine isn't being random. It's backing up what macOS marks as changed, and some files behave like giant blocks instead of tidy little documents.
What to exclude and what to keep
The highest-impact improvement is usually exclusion. Not everything on a Mac belongs in a Time Machine backup.
Open System Settings > General > Time Machine > Options and review what's being included. For more advanced setups, macOS also allows exclusions through tmutil addexclusion, including sticky exclusions for paths that tend to move around. That's especially useful for technical users dealing with bulky development folders or lab machines, as described in Howard Oakley's guide to faster Time Machine backups.
A practical review often looks like this:
- Exclude virtual machines: Parallels, VMware, and similar files change internally all the time and can bloat backups fast.
- Review developer folders: Xcode and related build artefacts are common offenders on work Macs.
- Be selective with Downloads: Temporary installers, duplicated ZIPs, and one-time media files rarely need long-term versioning.
- Don't blindly exclude user data: Documents, photos, and active working folders usually belong in the backup unless they're protected another way.
A simple comparison helps:
| Folder or data type | Usually keep in Time Machine | Often worth excluding |
|---|---|---|
| Documents and Desktop | Yes | Rarely |
| Photos and personal files | Yes | Only if protected elsewhere |
| Virtual machine files | Sometimes | Often |
| Downloads | Sometimes | Often |
| Xcode and build artefacts | Sometimes | Often |
You should also check whether backups are finishing on schedule. Open Time Machine settings and confirm the latest successful backup is recent. If the drive is nearly full, macOS will manage old history automatically, but a too-small drive leaves you with shallower history and fewer restore points.
Back up what you'd regret losing, not every disposable file your Mac happens to touch.
How to Restore Data from a Time Machine Backup
Backups only earn their keep when restore day arrives. Most restores fall into one of two camps. You either need one missing item back, or you need to rebuild a Mac after replacement, repair, or migration.
Restore one file or folder
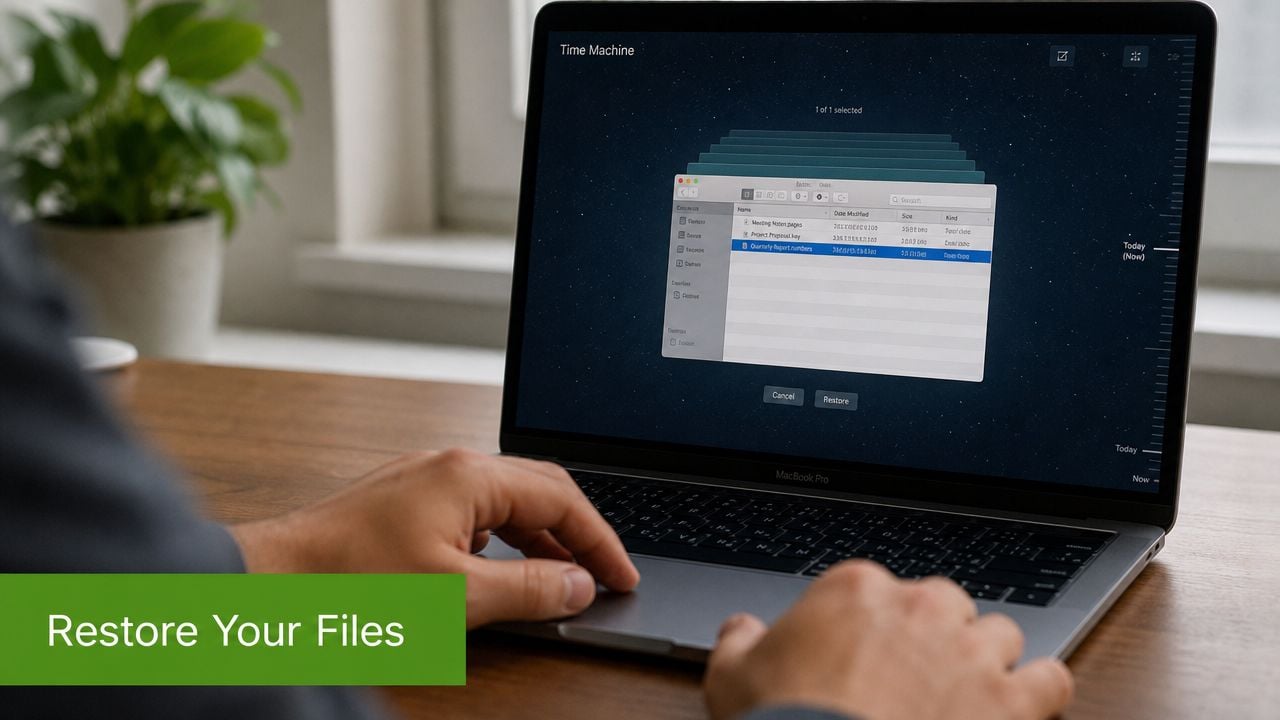
This is the everyday Time Machine win. You deleted a spreadsheet, overwrote a Pages document, or want yesterday's version instead of today's.
Start in the folder where the file used to live. Open Time Machine from the menu bar or through Spotlight, then move backward through snapshots until you find the version you want. Select the file and click Restore. macOS places it back in its original location.
That works best when you know roughly where the file lived. If you don't, use Finder search first, then enter Time Machine from the likely folder. For routine recovery, this is one of the easiest systems Apple has ever built.
If you're trying to recover something that seems to have vanished entirely, this walkthrough on how to recover deleted files on a Mac is a useful companion to the built-in restore process.
Restore a full Mac with Migration Assistant
A full restore is different. You'd use Migration Assistant when moving to a new Mac, replacing a failed internal drive, or rebuilding after a major issue. Instead of restoring one item, you bring back user accounts, applications, settings, and much of the environment that made the old Mac feel familiar.
The process is straightforward in concept:
- Connect the Time Machine backup drive.
- Open Migration Assistant on the destination Mac.
- Choose to transfer from a Time Machine backup.
- Select the backup date you want.
- Choose the users, apps, and data to migrate.
This is also where hardware choices show up clearly. For the fastest backup and restore speeds, connect an NVMe SSD via a Thunderbolt port, which can achieve 2–3 GB/s. Standard USB connections may only yield around 36 MB/s, and Wi-Fi is far less reliable for this kind of work according to user benchmark discussions about slow Time Machine backup and restore performance.
If you're restoring a full Mac, speed matters because large migrations can become all-day events on slower links. Reliability matters even more. For a major restore, a direct wired connection to the backup drive is the safest approach.
Use file-level restore for small mistakes. Use Migration Assistant when you want the Mac itself to come back, not just a document.
One important caution belongs here. Restoring an old file successfully doesn't guarantee the modern app will handle it properly. If the file is business-critical, open it, inspect it, and confirm the data inside is still usable before you assume the restore solved the problem.
Advanced Backup Strategies and Best Practices
Time Machine is excellent, but it shouldn't carry the whole load by itself. The professional standard is to build layers, so one failure doesn't wipe out every path back to your data.
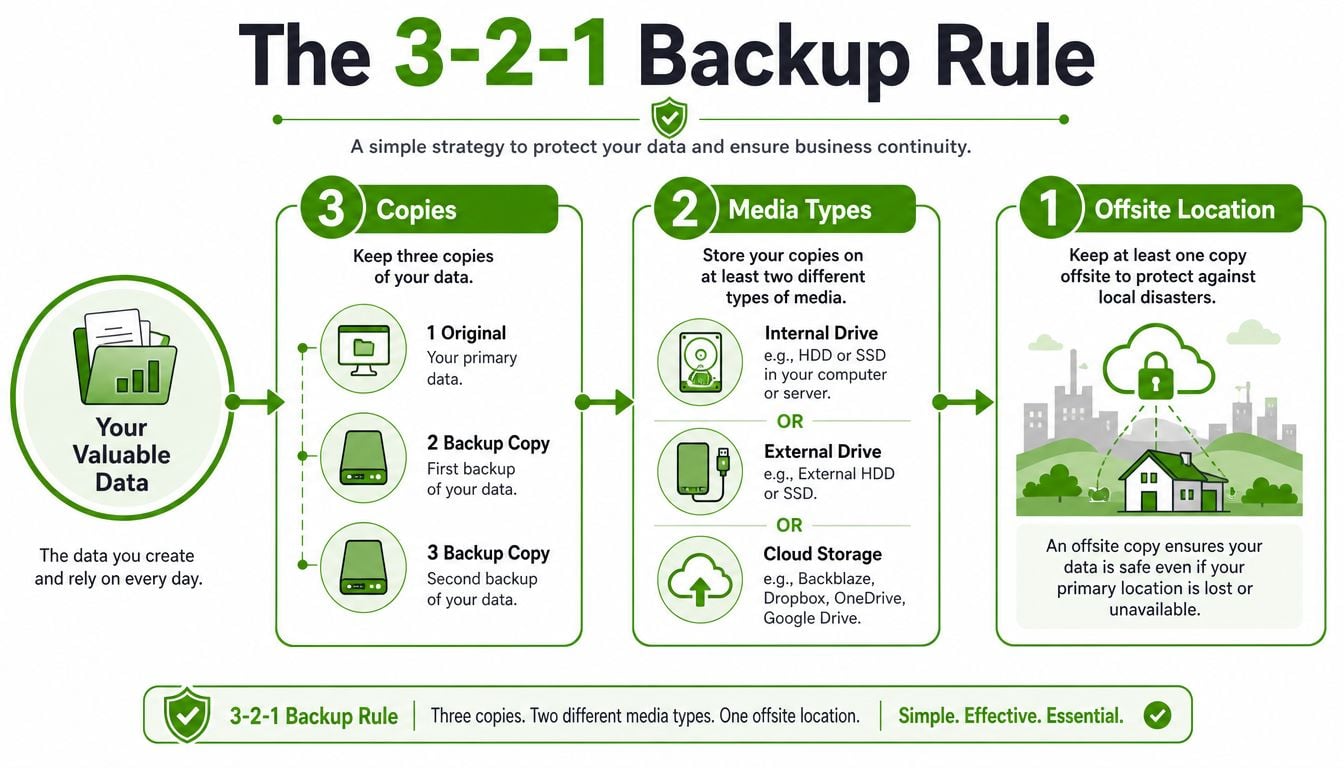
Why Time Machine is only one layer
The clearest framework is the 3-2-1 rule. Keep 3 copies of your data, use 2 media types, and make sure 1 copy is offsite. Experts also recommend manually verifying Time Machine backups 2–3 times a year because the default set-and-forget habit can otherwise lead to silent data loss according to this 3-2-1 Mac backup planning guide.
That changes the way you think about Time Machine. It stops being the backup plan and becomes one layer inside a larger one.
A simple home example might look like this:
- Original copy: Your Mac's internal storage.
- Local backup: A Time Machine drive connected at home.
- Offsite copy: A separate backup stored away from the Mac, or a cloud-based copy of your critical data.
For a small office, the same principle applies, but the implementation gets stricter. One employee's desk drive is not a disaster recovery plan. If theft, fire, flood, or ransomware affects the main machine and the nearby backup at the same time, you need another path.
Network and offsite choices that make sense
A network backup can be convenient, especially if more than one Mac needs protection. A NAS can centralise storage and make automatic backups easier to manage across a household or office. The trade-off is complexity. Network shares, Wi-Fi quality, and service order on the Mac all affect reliability.
For Macs that stay in one place, a wired approach is usually cleaner. If you do use a network target, favour Ethernet where possible and keep an eye on whether the Mac is using the wired path you intended rather than preferring Wi-Fi.
Verification matters just as much as storage design. A solid routine includes:
| Check | Why it matters |
|---|---|
| Confirm the most recent backup date | Catches silent failures early |
| Restore a sample file | Proves restore actually works |
| Open an older archived file | Tests long-term usability, not just file presence |
| Review offsite copy status | Protects against local disaster |
That third line is the overlooked one. Plenty of backup routines prove that a file exists. Fewer prove that an older invoice database, design archive, or project package still opens on the current system. If your work depends on long-lived files, compatibility testing should be part of the schedule, not an afterthought.
For business use, there's another boundary worth stating clearly. Nerds 2 You does not provide remote services. Nerds 2 You doesn't provide full MSP services but does provide ongoing support and network monitoring for small and medium businesses.
Troubleshooting Issues and When to Call Nerds 2 You
Most Time Machine problems aren't dramatic. The backup drive doesn't appear. A backup stalls. Verification warnings show up. The Mac says it's preparing backup for far too long. These problems are frustrating, but they often respond to a few careful checks.
Common problems you can try first
Start with the physical basics. Disconnect and reconnect the drive. Try a different cable if one is available. Plug the drive directly into the Mac instead of through a hub. Restart the Mac, then open Time Machine settings and check whether the backup disk is still selected.
If the issue is speed or repeated failure, look at what changed recently:
- Large new files: A newly added VM, photo import, or mail database can affect backup behaviour.
- Disk space pressure: A crowded backup drive reduces flexibility and can complicate history retention.
- Network path problems: Wireless backups are more fragile than direct-attached ones.
- Disk health warnings: If Disk Utility reports errors, don't ignore them.
When you see verification-related messages, slow down before clicking through prompts. Verification trouble can point to a problem with the backup itself or with the drive storing it. If the data matters, avoid experiments that might overwrite or reset the only good copy you have.
When the risk is bigger than the fix
Home users usually call for help at the right moment when they stop trusting the backup. That instinct is healthy. If a restore fails, if the drive disconnects unpredictably, or if the files come back but won't open correctly, the issue is no longer just “how do I make Time Machine run?” It becomes “which part of my protection plan is actually dependable?”
That question is especially important for small businesses. In 2024, 68% of small businesses in the Edmonton area with 1–50 employees experienced data loss, with ransomware being a major cause according to this Edmonton-area service profile discussing on-site backup guidance for local businesses. In practice, that means backup planning has to account for accidental deletion, hardware failure, bad updates, and malicious encryption.
On-site support is often the safer option because someone can inspect the Mac, the external drive, the network setup, and the restore process together. That matters even more when the underlying problem is the usability gap. An archive that restores cleanly but no longer opens properly needs a different kind of validation than a simple missing-file recovery.
If you want help building a safer backup routine, checking whether your Time Machine history is healthy, or testing whether older files are still usable on a modern Mac, contact Nerds 2 You Edmonton. Their technicians come on-site to homes and offices, help Mac users create practical backup plans, and support small and medium businesses with ongoing support and network monitoring without requiring full MSP arrangements.
Contact Nerds 2 You for quality professional service
Experience the difference with our dedicated team of experts ready to assist you. Whether you need immediate support or have questions about our services, we are here to help. Reach out today and let us provide you with the reliable service you deserve. Your satisfaction is our priority and we guarantee a prompt response to all inquiries.
Discover more from Nerds 2 You
Subscribe to get the latest posts sent to your email.