
You've got a new iPhone, a hand-me-down iPad, or a Mac that's finally been set up on the kitchen table. Then Apple stops the fun and asks for an Apple ID. That's usually the point where people pause, second-guess the payment screen, wonder which email to use, or get stuck on a verification message that doesn't explain much.
A proper Apple ID setup isn't just a box to tick. It controls your App Store downloads, iCloud sync, backups, messages, subscriptions, and a lot of the security around the device. When it's done cleanly, everything feels easy. When it's done halfway, recovery becomes painful and small mistakes follow you for years.
Most guides give you the glossy version. Real life is messier. Used devices can carry hidden management locks, region settings matter more than people expect, and the innocent-looking None payment option causes far more confusion than it should.
Table of Contents
- Your Key to the Apple Ecosystem
- Creating Your Apple ID on Any Device
- Securing Your Account with Two-Factor Authentication
- Setting Up Payment and Billing Information
- Using Family Sharing and Creating Child Accounts
- Troubleshooting Common Apple ID Setup Errors
- When You Need On-Site Help in Edmonton
Your Key to the Apple Ecosystem
Open a brand-new iPhone and the hardware feels polished right away. The camera is ready, the screen looks great, and the setup assistant moves along smoothly until you hit the Apple ID prompt. At that moment, the device goes from being a nice piece of electronics to being either fully yours or only partly usable.
With the account in place, the pieces start connecting. You can download apps from the App Store, sync photos into iCloud, use FaceTime, back up your data, and keep notes, contacts, calendars, and documents lined up across devices. Without that account, you're left with a limited version of the Apple experience.
That's why Apple ID setup deserves a little care. The decisions you make at the start, such as which email to use, which region to select, whether to attach a payment method, and how you handle security, affect everyday use later.
A rushed setup often works for the first hour and causes trouble six months later, usually when you need to recover the account under stress.
The same applies if the device isn't new. A used iPhone from a marketplace seller might look perfect but still have hidden restrictions. A family iPad being passed to a child needs different choices than a work Mac. An office environment may need a managed account instead of a personal one.
Apple's account system is good when it's configured with intention. It's frustrating when people guess their way through screens they don't fully understand.
Creating Your Apple ID on Any Device
The actual account is the same, but the path to create it changes a bit depending on what's in front of you. Apple has made the screens cleaner over the years, though some important details are still easy to miss.
On iPhone and iPad
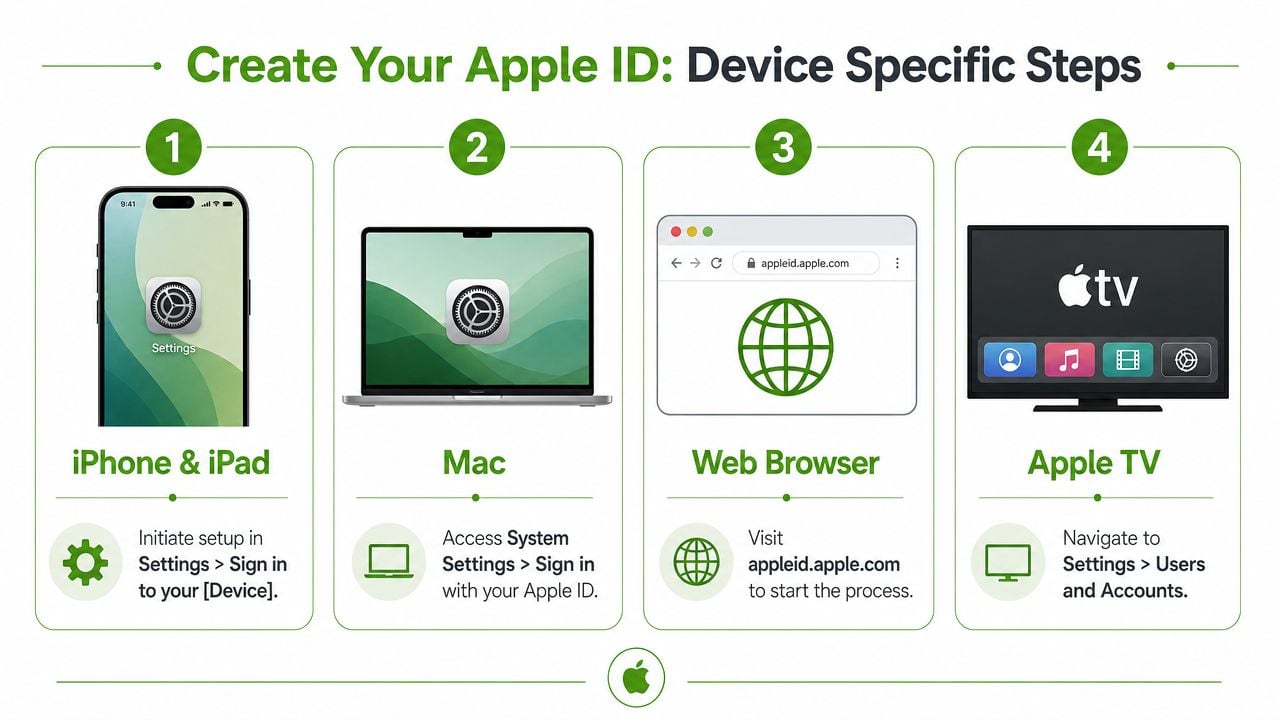
If you're setting up a new iPhone or iPad, the prompt appears during the initial device setup. If you skipped it, open Settings and tap Sign in to your iPhone or Sign in to your iPad.
You'll be asked to create an Apple Account if you don't already have one. For Canadian users, Apple's official support says setup requires a valid phone number, your birth date, and choosing Canada as the country or region. Apple also confirms that you can choose None as the payment method, and the primary email address you enter becomes the identifier for the account in this process, as noted in Apple's Canadian Apple Account setup guidance.
That sounds straightforward, but each item has a purpose:
- Valid phone number: Apple uses it for identity verification and recovery.
- Birth date: This affects age-related settings and can create complications later if entered incorrectly.
- Country or region: This controls service availability and local content.
- Primary email: Pick one you control long-term, not an old school or work address you might lose.
If your email isn't already working properly on the device, sort that out before you begin. It's much easier to verify the account when your inbox is accessible. If you need help with that piece, this guide on setting up email on iPhone is a useful companion.
On a Mac
On a Mac, go to System Settings and choose the Apple ID sign-in area. The process feels similar, but users often hit problems here because they try to rush through verification from the same machine without checking their inbox or phone first.
A better approach is simple:
- Start the account creation from System Settings.
- Use an email address you'll keep.
- Keep your phone beside you for verification.
- Confirm the region carefully before moving on.
- Finish any verification prompts before opening the App Store or iCloud settings.
Apple ID setup on a Mac goes more smoothly when you treat it as an account task, not just a device task. People often think the Mac itself is the problem when the issue is a missed verification step.
On the web or a PC
If you're on a Windows PC, borrowing a computer, or prefer a browser, creating the account online can be cleaner. It removes some device-specific distractions and lets you focus on the essentials.
Use the web route when:
| Situation | Better choice |
|---|---|
| You don't own an Apple device yet | Create the account in a browser first |
| Your iPhone setup keeps looping | Finish account creation on the web, then sign in on the device |
| You want to verify email and phone separately | Browser setup is usually easier to manage |
The most common mistake here is using an email address that was tied to an older Apple account years ago. If Apple says the address is already in use, stop and verify whether that old account exists before trying variations or creating a second identity. Multiple half-used accounts create more confusion than they solve.
Practical rule: Use one personal email you can access today, next year, and after a phone upgrade. Stability matters more than clever naming.
Securing Your Account with Two-Factor Authentication
A working Apple ID isn't the same as a secure Apple ID. That distinction matters most when a device is lost, a password is forgotten, or someone tries to break into the account.
Why this step matters more than people think
For individual users in Canada, one cited setup problem is skipping secondary security information right after account creation. That omission correlates with a 65% higher rate of account lockouts during recovery scenarios, and adding a trusted phone number, even a landline, as a Recovery Contact significantly improves recovery success to 95%. The same guidance notes that two-factor authentication is automatically enabled on qualifying newer systems and stresses using the primary email as the account identifier plus a strong unique password, according to this Apple Support Community discussion.
That aligns with what technicians see in practice. People rarely call for help because setup was too secure. They call because they can't get back in after changing phones, losing access to an old email account, or forgetting which number was on file.
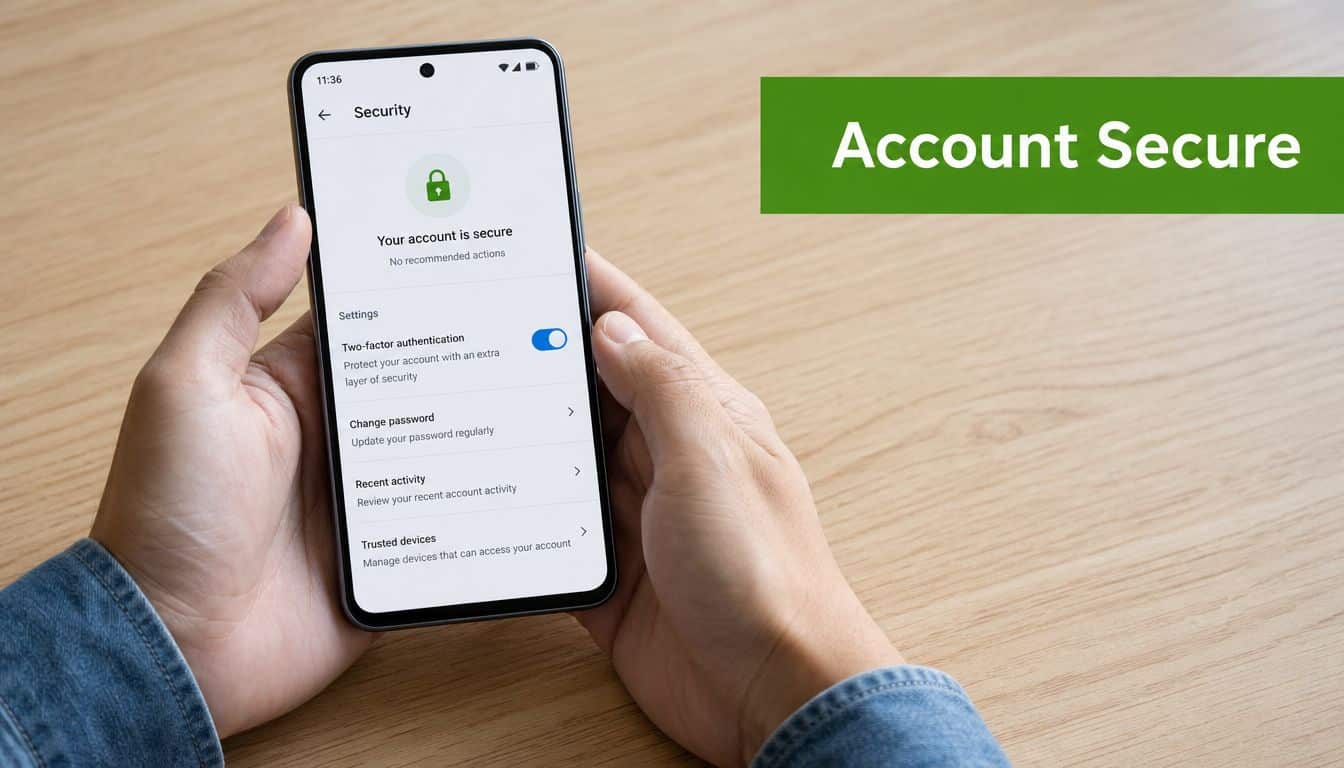
Two-factor authentication acts like a second lock on the door. Even if someone gets your password, they still need access to a trusted method of approval.
If you want a plain-language look at the broader threat environment, this write-up on Apple ID scam threats is worth reading. Scam messages often look routine, especially when they mimic billing or security alerts.
What to set up right away
Don't leave security for later. Do it while the account is fresh and you still remember every detail you entered.
- Use a unique password: Don't reuse the same password from your email, internet provider, or mobile carrier.
- Add trusted phone access: Mobile is ideal, but the cited guidance notes that even a landline can help in recovery.
- Review recovery options: Make sure the account doesn't depend on a mailbox you hardly use.
- Finish all prompts: If Apple asks for additional security details, complete them before you start downloading apps.
A trusted device also matters. If you own more than one Apple product, signing into a second known device gives you a safer path if one goes missing or gets wiped.
If account recovery sounds like something for future-you to worry about, that's exactly when it becomes a problem. Recovery only feels optional before something goes wrong.
Setting Up Payment and Billing Information
This is the part that makes a lot of people hesitate. They see a billing screen and assume Apple is demanding a credit card before the account can exist. That isn't always true.
When to add a card and when not to
If you plan to buy apps, subscribe to services, rent films, or expand paid storage, adding a payment method can save time. It keeps future purchases smooth and avoids repeated prompts.
If you only want free apps, want to keep spending tightly controlled, or you're setting up a device for someone else, you may prefer not to attach payment details right away. That choice is valid.
Apple's support documentation confirms users can select None as a payment option during setup, which avoids immediate charges. That option is often glossed over or explained poorly in third-party guides, as reflected in Apple's account setup support information.
Where people get tripped up
The billing page creates confusion because people expect a simple yes-or-no decision, but the context matters.
- For a personal primary device: Adding your usual card can be convenient if you regularly use the App Store.
- For a child's device or spare iPad: Choosing None may be the better starting point.
- For privacy-conscious users: Holding off on billing details keeps setup focused on account access first.
A good habit is to separate account creation from purchase readiness. Get the Apple ID fully working, verify the email and phone details, sign in successfully, and only then decide whether billing belongs on the account.
If your Mac is already tight on storage, that can also complicate updates and app downloads later. Before loading it up with purchases and sync data, it helps to review practical cleanup steps such as this guide on freeing up space on a Mac.
Good setup choice: Select None if you're not ready to buy anything yet. Add a payment method later, on your terms.
Using Family Sharing and Creating Child Accounts
Apple ID setup gets more nuanced when it's not just about one person. In a family, you're balancing convenience, spending controls, content access, and age-appropriate settings.
What Family Sharing is good at
Family Sharing works best when one adult keeps the family group organised and everyone else gets access without sharing a single login. That's an important distinction. Family members should not all sign into one Apple ID just because it seems easier.
Used properly, Family Sharing can help a household keep purchases and subscriptions manageable while preserving separate accounts for each person. It's also the cleaner way to handle a child's iPhone or iPad.
A sensible family setup usually looks like this:
- One adult creates the family group.
- Each family member uses their own Apple account.
- Purchase sharing and parental controls are turned on where needed.
- Child accounts are created with accurate details from the start.
Creating a child account the right way
Apple's guidance for parents in Canada is very clear on one point. When creating an Apple Account for a child, you must enter the child's correct birth date, and Apple says changes to that date are significantly restricted later. The same guidance notes the child account can use the child's own email address, a suggested @icloud.com address, or a Game Center nickname, as explained in Apple's Canadian family setup support page.
That birth date isn't just paperwork. It determines how parental controls and age-appropriate settings apply.
Here's the practical approach:
- Use the child's real date of birth: Don't age them up to bypass restrictions. That shortcut usually creates bigger issues later.
- Decide on the email path: A personal email can work, but a fresh iCloud option is often simpler for younger children.
- Keep the family organiser involved: The adult account should remain accessible and current, especially for approvals and changes.
- Enable purchase approval settings: This prevents surprise app spending and gives parents visibility.
A lot of frustration starts when families create a child's account casually, then realise years later that the age settings don't line up with reality. Fixing that after the fact is much harder than entering it correctly once.
Children need their own Apple accounts. They don't need the parent's Apple ID password.
Troubleshooting Common Apple ID Setup Errors
When Apple ID setup fails, the message on screen is often too short to be useful. The wording sounds technical, but the actual cause is usually one of a few repeat offenders.
Errors that usually have a simple fix
Some messages look severe but aren't.
| Error message | What it often means | What to try |
|---|---|---|
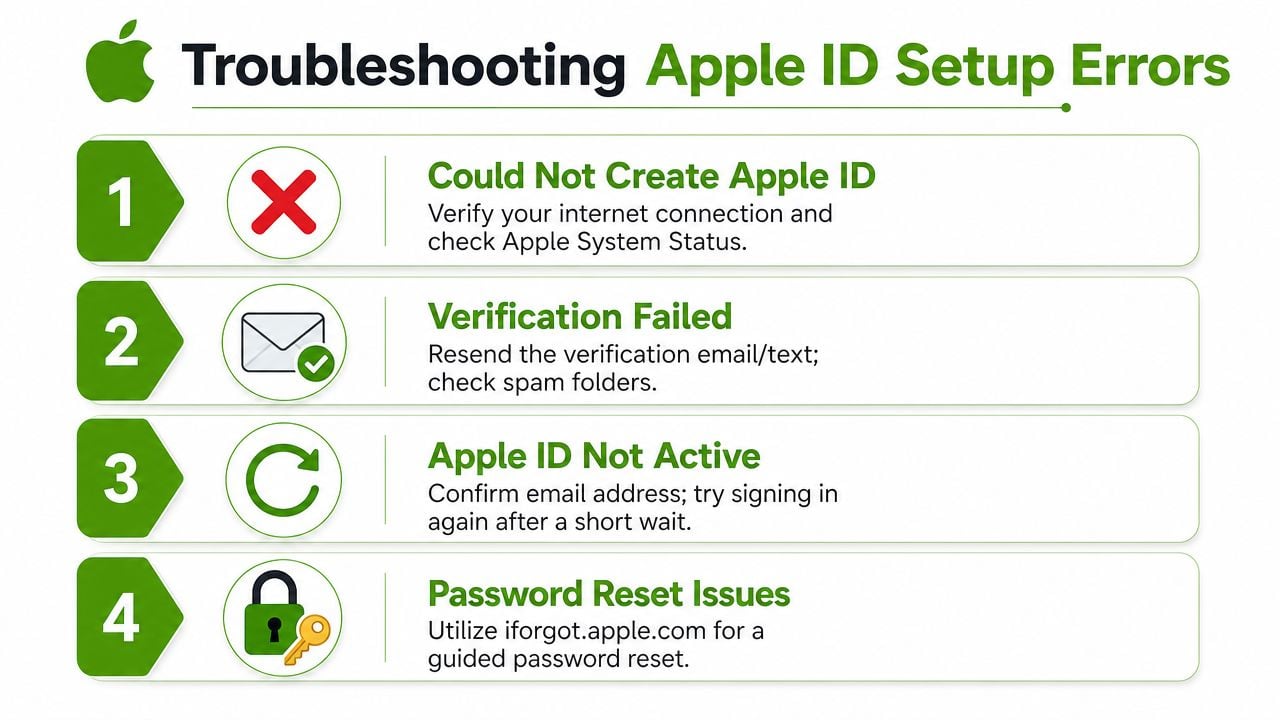
| This email address is already in use | The email was tied to an older Apple account | Try account recovery before creating a different account |
| Verification failed | The code, email, or text wasn't completed properly | Resend the verification and check spam or junk folders |
| Could not create Apple ID at this time | Temporary service issue or incomplete required info | Confirm network stability and re-check all entered details |
| Cannot verify email address | Verification didn't reach the mailbox, or something deeper is blocking setup | Test the email account separately, then investigate device restrictions |
The wrong response is to keep hammering the same button. Repeated failed attempts can make the process feel worse and blur the underlying issue.
A better sequence is:
- Pause and read the exact message: Small wording changes matter.
- Check your email account independently: Make sure you can send and receive from it.
- Confirm your phone can receive verification prompts: Weak signal or filtering can interfere.
- Try one variable at a time: Changing email, password, device, and network all at once makes diagnosis harder.
The used device problem most guides skip
Often, generic articles fail to address this particular issue. A used or refurbished iPhone can look completely normal and still be blocked by MDM, or Mobile Device Management. In that case, the problem isn't your email address, password, or patience.
A cited Reddit discussion describes multiple cases where users with used iPhone 11 devices ran into account creation failures tied to hidden MDM restrictions from schools or employers. The thread specifically points to errors such as Cannot verify email address appearing on devices that were still managed behind the scenes, as discussed in this Reddit applehelp thread about Apple account creation problems.
That's a very real trap in the resale market.
If you suspect MDM, look for signs like:
- Management prompts during setup: References to organisation control, profiles, or supervision.
- Unusual restrictions: Missing settings, blocked sign-in changes, or activation steps that don't fit a normal personal device.
- Seller vagueness: If the seller can't clearly explain where the device came from, be cautious.
If the device is tied to a previous school or business, the clean fix usually has to come from that organisation or the seller. There isn't a legitimate technician shortcut that makes those restrictions disappear.
A used Apple device isn't truly yours until you know it's free of previous management and ownership controls.
When You Need On-Site Help in Edmonton
Most Apple ID setup problems can be solved with steady troubleshooting. Some can't. Password recovery loops, account verification problems tied to old contact details, hidden management restrictions on used devices, and hardware issues that interrupt setup all fall into the category where DIY starts costing more time than it saves.
That's also where in-person help makes a difference. A technician standing beside the device can see whether the issue is the account, the operating system, the network, the email configuration, or the device itself. That's much faster than guessing through overlapping symptoms.
For Apple users who need local support, Apple computer repair in Edmonton is available on-site rather than through a remote session. Nerds 2 You does not provide remote services. Nerds 2 You doesn't provide full MSP services but does provide ongoing support and network monitoring for small and medium businesses.
That model suits Apple ID work well. Setup and recovery problems often involve trusted devices, text verification, local Wi-Fi, password managers, browser sessions, and the physical device in front of you. Being on-site helps untangle the whole picture instead of treating only one symptom.
If your Apple ID setup has stalled, your used iPhone looks suspiciously managed, or your Mac and iPhone won't cooperate during sign-in, Nerds 2 You Edmonton can come to your home or office and help sort it out properly.
Contact Nerds 2 You for quality professional service
Experience the difference with our dedicated team of experts ready to assist you. Whether you need immediate support or have questions about our services, we are here to help. Reach out today and let us provide you with the reliable service you deserve. Your satisfaction is our priority and we guarantee a prompt response to all inquiries.
Discover more from Nerds 2 You
Subscribe to get the latest posts sent to your email.