
Your desktop was working yesterday. Today you press the power button and get silence, or the fans twitch for a second and stop, or the machine starts but drops out the moment you open something demanding. That's the point where a lot of Edmonton owners wonder if they should keep troubleshooting, buy a part, or hand the whole thing over to someone with a screwdriver and a proper process.
A computer power supply replacement isn't glamorous, but it's one of the most practical repairs you can learn. It sits right at the centre of the system. If it fails, everything else can look broken even when the other parts are fine. The good news is that replacing one is often manageable if you work carefully, choose the right unit, and respect a few safety rules that people skip at their own expense.
If you're capable with basic tools, this guide will walk you through the practical decisions. If you hit the point where the job stops feeling straightforward, there's no shame in stepping off the DIY path and booking an on-site technician instead.
Table of Contents
- Is Your Power Supply the Problem
- Symptoms of a Dying PSU
- How to Choose Your New Power Supply
- Essential Tools and Safety Precautions
- Your Step-by-Step Replacement Guide
- Testing Your New PSU and When to Call a Nerd
Is Your Power Supply the Problem
You press the power button and nothing happens. No lights. No fans. No display. That doesn't automatically prove the power supply is dead, but it absolutely puts the PSU high on the suspect list.
The PSU is the part that converts wall power into the lower voltages your motherboard, drives, graphics card, and fans use. When it goes bad, the machine may look completely dead, or it may behave in ways that make you blame the wrong component first. That's why people often waste time reseating RAM or replacing a graphics card when the underlying issue is power delivery.
There's a solid reason technicians take PSU complaints seriously. Historically, power supplies are responsible for approximately 20% of all hardware failures in personal computers, which means one in five computer failures points directly to the PSU according to this power supply replacement reference. The common causes listed there include power surges, capacitor failures, and overheating.
Practical rule: A failed PSU is common enough that you should treat it as a normal repair path, not a freak accident.
That said, don't jump straight to buying parts. Start with the basics.
- Check the wall side: Confirm the outlet, power bar, and power cable are all working.
- Look for any sign of life: Motherboard LEDs, fan twitching, drive noises, or charging lights on connected devices can all tell you something.
- Think about what happened before the failure: Sudden shutdowns, odd electrical smells, or instability under load often point toward the PSU more than the motherboard.
If the machine was perfectly stable and then died after a move, cable disturbance may be the problem. If it had been shutting off during gaming or heavy work, the PSU moves much higher up the list.
Symptoms of a Dying PSU
A PSU doesn't always fail cleanly. Sometimes it warns you for days or weeks. The trick is separating power symptoms from general “my PC is acting weird” symptoms.
Shutdowns that follow demand
One of the strongest clues is a computer that runs lightly loaded tasks but shuts down, reboots, or loses display output when you put it to work. Gaming, video editing, rendering, and large file operations can all expose a weak or failing PSU because the system asks for more stable power at once.
That pattern matters. If the machine crashes only when the graphics card and CPU are both working hard, I start suspecting power before I start suspecting software.
If a PC idles fine but falls over during real work, don't assume Windows is the culprit. Check the power path.
Noises and smells you shouldn't ignore
Listen at the back of the case. A whining, buzzing, or clicking sound from the PSU area can be a warning sign. Fan noise by itself isn't always bad, but a new electrical sound usually means something changed.
Smell matters too. Burning plastic, hot electronics, or that sharp ozone-like odour is a stop sign. Shut the system down and unplug it. Don't keep “testing” a machine that smells wrong.
Intermittent power and false leads
A bad PSU can mimic other faults:
- Random restarts: These often look like operating system instability when unstable power is the issue.
- Failure to detect devices consistently: Drives may disappear or boot attempts may fail if components aren't being powered reliably.
- Fans spinning without a proper start-up: The system may show partial signs of life but still fail to complete a normal boot.
If you're looking after office machines, this is also a good time to think about the bigger refresh question. A practical read on knowing when to upgrade business tech can help you decide whether you're fixing one bad part in an otherwise useful computer or sinking time into a machine that's due for broader replacement.
What doesn't prove the PSU is bad
A dead PC can still be caused by a failed motherboard, bad front-panel switch, damaged power cable, or a short caused by a loose screw or cable. That's why diagnosis stays grounded in patterns, not guesswork.
Here's the simple version:
| Symptom | More suggestive of PSU | Could still be something else |
|---|---|---|
| No power at all | Yes | Yes |
| Shutdown under load | Yes | Yes |
| Electrical smell from rear of case | Yes | Less likely |
| Blue screens with normal power behaviour | Less likely | Yes |
If you've got several PSU symptoms stacked together, a computer power supply replacement starts making sense. If you've got only one vague symptom, slow down.
How to Choose Your New Power Supply
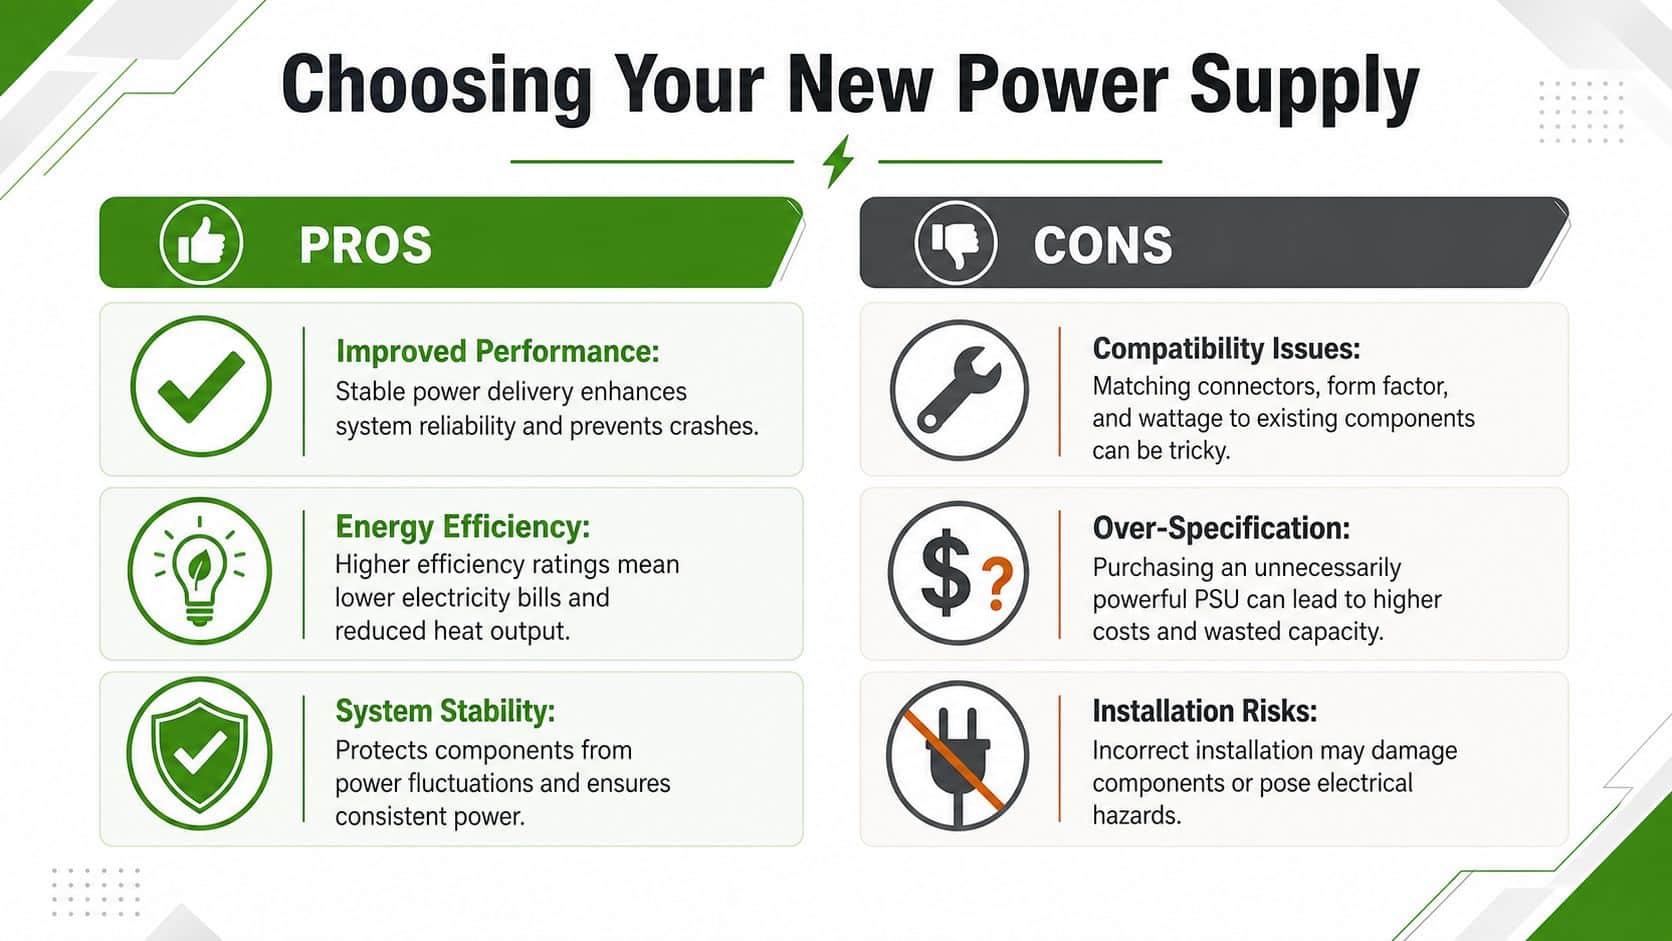
Buying the replacement is where many first-timers go wrong. They focus on wattage alone, or they buy whatever is cheap, or they assume every ATX unit fits every case and every cable matches every board. That's how easy repairs turn into irritating ones.
The Edmonton market gives you a very wide pricing spread. According to Edmonton PSU price listings, non-modular power supply units range from CAD $56.00 to $1,232.00, while fully modular units start at CAD $126.00 and can go up to $2,912.00. That tells you two things. First, there's a valid budget end for ordinary replacements. Second, it's easy to overspend if you buy for fantasy upgrades instead of the machine in front of you.
Fit comes first
Start with form factor. Most standard desktop towers use ATX power supplies, but compact systems may use SFX or something more proprietary. Measure the old unit if the case looks tight, and check how it mounts.
Also look at cable reach. A PSU can technically fit and still make routing miserable if the CPU power cable barely reaches the top of the motherboard.
Wattage and connectors matter more than marketing
You need enough wattage for the installed parts, plus sensible headroom. You do not need to buy a giant unit just because the box looks impressive. Over-specifying the PSU mostly increases cost and can make shopping noisier and more confusing.
Check the connector set before you buy:
- Motherboard power: The main board connector must match your system.
- CPU power: Confirm the CPU power lead your motherboard needs.
- Graphics card power: Some GPUs need dedicated power connectors, and the count matters.
- Drive power: SATA power is still relevant if you have SSDs, hard drives, or certain accessories.
If you're comparing common mid-range options, a focused guide to budget-friendly 750w power supplies can help you see how features and cable layouts differ without getting lost in enthusiast jargon.
Modular versus non-modular
This is the trade-off often valued in practice.
| Type | What works well | What's annoying |
|---|---|---|
| Non-modular | Lower entry cost, simple for basic builds | Extra cables can clutter the case |
| Semi-modular | A decent compromise for many systems | Still not as clean as fully modular |
| Fully modular | Easier cable management, simpler swap work in tighter cases | Costs more |
A non-modular unit is often perfectly fine for a straightforward home or office desktop. If the case has room and the system isn't packed with hardware, you can tuck away unused cables and move on.
A fully modular unit makes the install cleaner, especially if you have a cramped case or want easier future maintenance. It also reduces the mess that can block airflow. The catch is obvious. You pay more.
Buy for the actual box under your desk, not the imaginary build you might assemble later.
If you'd rather skip compatibility checking entirely, hardware upgrade support in Edmonton is one way to have the part selected and fitted around your existing system rather than guessing at connectors and clearance.
Essential Tools and Safety Precautions
You don't need a workshop full of kit for a computer power supply replacement. You do need discipline. Most repair mistakes happen because someone is rushing, working in bad light, or assuming a desktop is harmless once it's shut down.
Set up your workspace properly
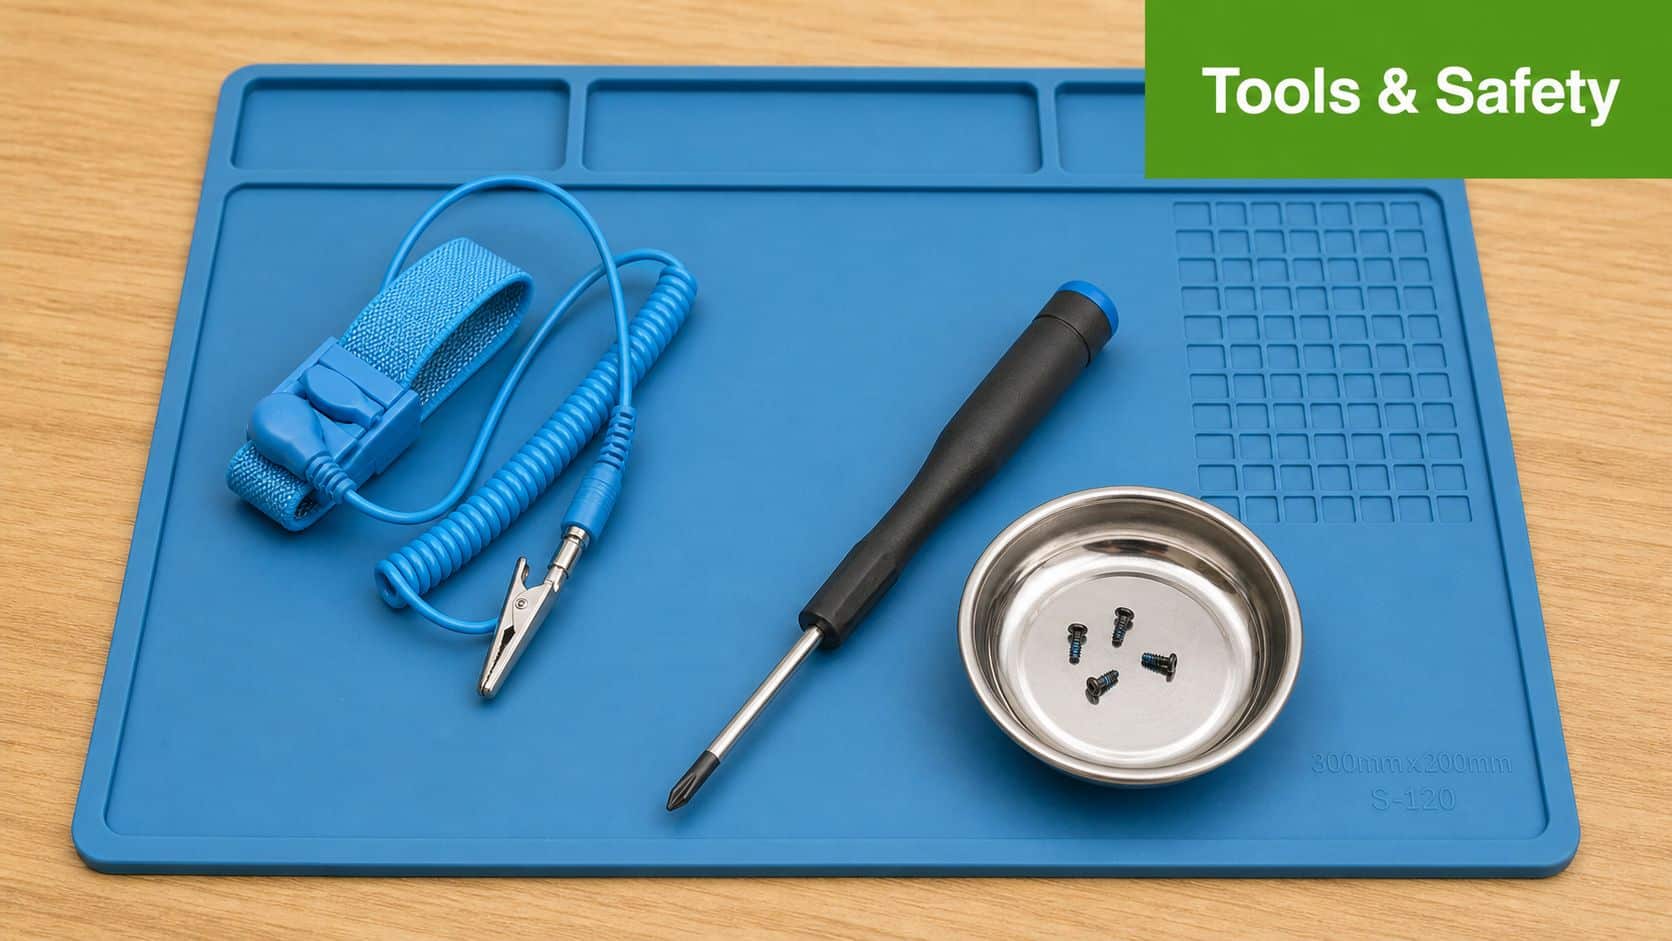
Get the machine onto a stable table with decent lighting. A Phillips screwdriver, a few cable ties or Velcro straps, and an anti-static wrist strap cover the basics for most towers. A small magnetic tray helps keep screws from vanishing under furniture.
For anyone who likes to verify power status around cords and outlets before they begin, a simple look at safety equipment for electrical work shows the kind of tool many people keep nearby for general electrical caution.
Before the case opens, do this in order:
- Shut the PC down fully.
- Unplug the computer from the wall.
- Press and hold the power button for a few moments to discharge residual power.
- Disconnect external peripherals so nothing tugs on the system while you work.
The two details people miss
The first is the voltage selector switch on some power supplies. For Canadian and North American systems, a critical installation step is setting that switch to “115” to match the 120V/60Hz grid. If it's left at “230V”, the PC may fail to start or you may damage components, as noted in this PSU replacement safety guide.
The second is fan orientation. In most modern cases, the PSU fan should face down so it can pull air through the bottom intake path the case was designed for. Mounting it the wrong way can interfere with cooling and cause the kind of overheating that sends you back into the case later.
Safety note: Never open the PSU housing itself. Replacing the unit is normal repair work. Opening the sealed power supply case is not a beginner task.
If the system is dusty, clean around the PSU bay and intake area while you have access. Dust doesn't prove a power problem, but it doesn't help cooling either.
Your Step-by-Step Replacement Guide
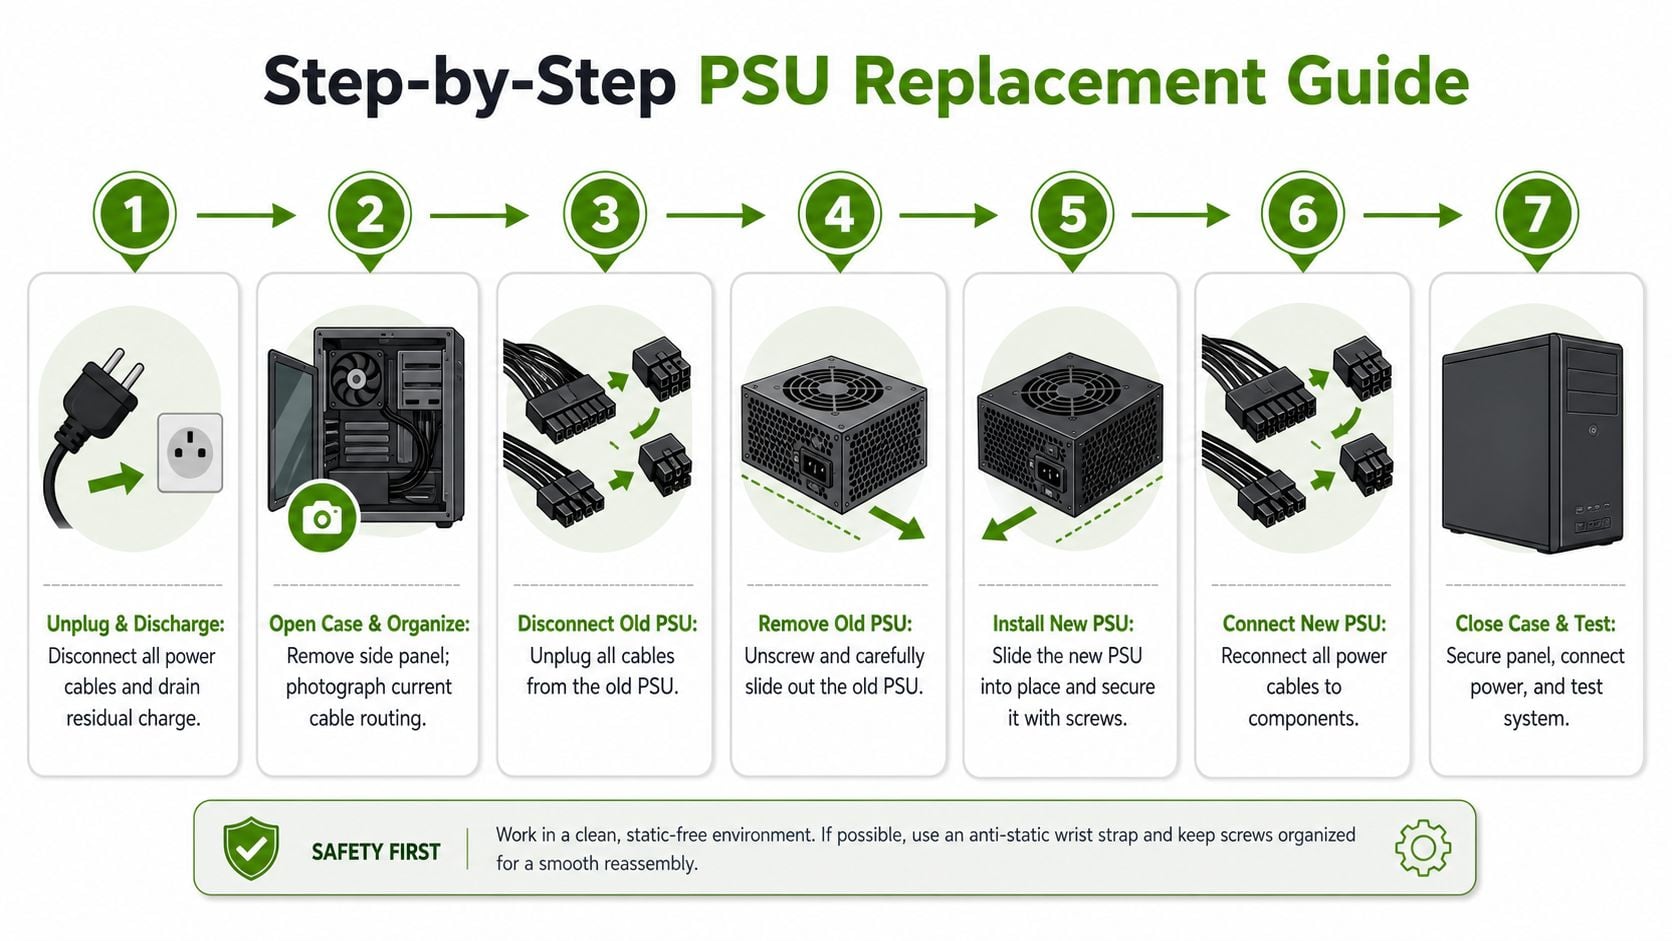
The physical swap is simple in principle. Disconnect the old unit, remove it, install the new one, reconnect everything carefully, and tidy the cables so airflow stays clear.
Before you remove anything
Take off the side panel and pause. Don't start yanking cables. Look at where the old PSU connects to the motherboard, CPU power socket, graphics card, storage drives, and any fan or accessory hubs drawing power.
Use your phone and take clear photos from a few angles. Those photos save people constantly.
Then work through the cabling methodically:
- Main motherboard cable: Release the clip before pulling.
- CPU power cable: Usually near the top edge of the motherboard and sometimes awkward to reach.
- GPU power cables: Press the latch and pull straight.
- SATA or peripheral power: Remove these gently from drives and accessories.
If you're replacing a modular PSU, don't reuse old modular cables unless they are specifically the correct set for that exact unit. Mixing modular cables between brands or models is one of the easiest ways to create a very bad day.
Removing the old unit
Once every power lead is disconnected from the system, move to the rear of the case. Support the PSU with one hand while removing the mounting screws with the other. Some units slide out easily. Others need a bit of angle because the case is tight.
Set the old power supply aside and compare it physically with the new one before installing anything. Check mounting orientation, fan direction, and where the cables will exit.
A few things that slow people down here:
- A top-mounted older case: Cable routes can differ from newer bottom-mounted layouts.
- A compact gaming case: You may need to shift cables out of the way before the PSU comes free.
- A prebuilt system: Proprietary cases can make access tighter than a standard DIY tower.
If you pull the old PSU and suddenly notice damaged motherboard connectors, melted plastic, or signs of heat damage, stop. That's the point where a broader diagnosis makes more sense than continuing blindly. If the board itself may be involved, motherboard repair service options are more relevant than installing another power supply and hoping.
Installing and reconnecting the new PSU
Seat the new PSU into place with the correct orientation and secure it using the case screws. Don't over-tighten them. Snug is enough.
If the unit is modular or semi-modular, connect only the cables you need. That makes routing easier and keeps airflow cleaner. Route cables before plugging them in where possible, especially the CPU power lead, since that one is often hardest to reach once the case gets crowded.
Reconnect in a sensible order:
- Motherboard main power first
- CPU power second
- Graphics card power if required
- Drive and accessory power last
Push each connector firmly until it's fully seated. Partial insertion is one of the most common causes of “it still doesn't work” after a replacement. The plug may look connected and still be just loose enough to fail.
Cable management doesn't need to be beautiful. It needs to be practical. Keep cables away from case fans, avoid sharp bends at the connector heads, and use ties or straps to stop loose wiring from drifting into airflow paths.
A neat case is nice. A case with unobstructed airflow and fully seated connectors is what actually matters.
Before you close the side panel, do a visual sweep. Check that nothing is touching a fan blade, no connector is half out, and the rear power switch on the PSU is set correctly for use when you're ready to test.
Testing Your New PSU and When to Call a Nerd
A successful computer power supply replacement isn't “the fans came on.” That's only the first checkpoint. Proper testing catches the loose cable, wrong connector, or under-load failure before you button everything up and call it done.
Use the four-stage check
Professional workflow uses a four-stage validation process after PSU replacement: POST, BIOS/UEFI, OS stage, and a Functional stage with a real workload, according to this technician-focused replacement method.
Run it like this:
- POST: Power on and confirm you get display output and normal initial boot behaviour.
- BIOS/UEFI: Enter firmware and verify the system sees your storage and basic hardware normally.
- OS stage: Let the computer boot into Windows or your operating system without crashes or odd restart loops.
- Functional stage: Open something demanding enough to put the system under load and watch for shutdowns, black screens, or instability.
That final stage matters more than most first-timers realise. A machine can appear fixed and still fail once the CPU and graphics card ask for real power.
When DIY stops being productive
If the system still won't start, go back to the basics. Recheck the motherboard cable, CPU power cable, GPU power leads, and rear PSU switch. Also confirm the front-panel power button lead wasn't disturbed while you were working.
If you're now on your second round of opening and closing the case, it's fair to stop. Time has value, and frustration makes people force connectors or miss obvious details. Computer service and repair in Edmonton is often the cleaner option at that stage because the remaining problem may no longer be just the PSU.
Nerds 2 You does not provide remote services. Nerds 2 You doesn't provide full MSP services but does provide ongoing support and network monitoring for small and medium businesses.
That on-site model matters for power issues because a technician can inspect the actual machine, case layout, cabling, and connected hardware in person instead of trying to guess through messages or photos.
If you'd rather have the repair handled on-site, Nerds 2 You Edmonton provides in-person computer repair and support in the Edmonton area, which is useful when a PSU swap turns into a wider hardware problem or you don't want to risk damaging a good system while learning.
Contact Nerds 2 You for quality professional service
Experience the difference with our dedicated team of experts ready to assist you. Whether you need immediate support or have questions about our services, we are here to help. Reach out today and let us provide you with the reliable service you deserve. Your satisfaction is our priority and we guarantee a prompt response to all inquiries.
Discover more from Nerds 2 You
Subscribe to get the latest posts sent to your email.