
A laptop keyboard problem usually starts small. One sticky key. A keycap that pops off. A row that suddenly stops typing right before a deadline. Then you spill coffee, or the space bar starts missing every third press, and now you're pricing out a new machine before you know whether the problem is simple or serious.
For Edmonton users, that's the wrong first move. Some keyboard issues come from settings, drivers, or debris under a single key. Others need proper laptop computer keyboard repair, and a few aren't worth repairing at all unless the laptop is valuable enough to justify the work. The smartest path is to diagnose first, fix only what makes sense, and stop before a cheap problem turns into motherboard damage.
Table of Contents
Why Your Laptop Keyboard Stopped Working
Most failed laptop keyboards don't die all at once. They give clues first. Keys feel mushy, one section starts missing presses, or a spill leaves you with sticky movement and random input. If you catch the pattern early, you've got more options.
In Edmonton, I see three broad causes over and over. Software confusion, physical contamination, and hardware failure. Software problems can mimic bad hardware, especially when accessibility settings or drivers interfere with normal typing. Physical contamination usually means crumbs, dust, residue, or spill damage. Hardware failure shows up when a key mechanism breaks, a ribbon cable connection loosens, or the keyboard matrix itself fails.
A practical detail that gets missed is the difference between one bad key and many bad keys. One bad key often points to something local, like a dislodged cap, broken clip, or dirt under that switch area. A cluster of failed keys, or random behaviour across the board, usually points to a deeper issue.
Practical rule: If the problem affects one key, start small. If it affects whole rows, random groups, or follows a spill, assume the job may escalate fast.
Liquid damage deserves special caution. In the Edmonton area, keyboard spill repairs became common enough that repair practices shifted toward full assembly replacement in many cases. One verified local summary notes that over 35% of keyboard-related laptop repair requests were tied to liquid spills, and that severe cases often moved from partial repair to full keyboard assembly replacement because corrosion makes spot fixes unreliable.
That doesn't mean every spill destroys a keyboard. It does mean you shouldn't keep typing on a wet machine and hope for the best. The earlier you isolate the problem, the better your odds of a clean, limited repair.
Is It a Hardware or Software Problem
Before you touch a screwdriver, rule out the easy stuff. Reddit users in Edmonton often suggest trying software diagnostics or contacting the laptop maker before visiting a repair shop, because many people aren't sure whether the failure is physical in the first place, as discussed in this Edmonton laptop repair recommendations thread.
Start with the easiest checks
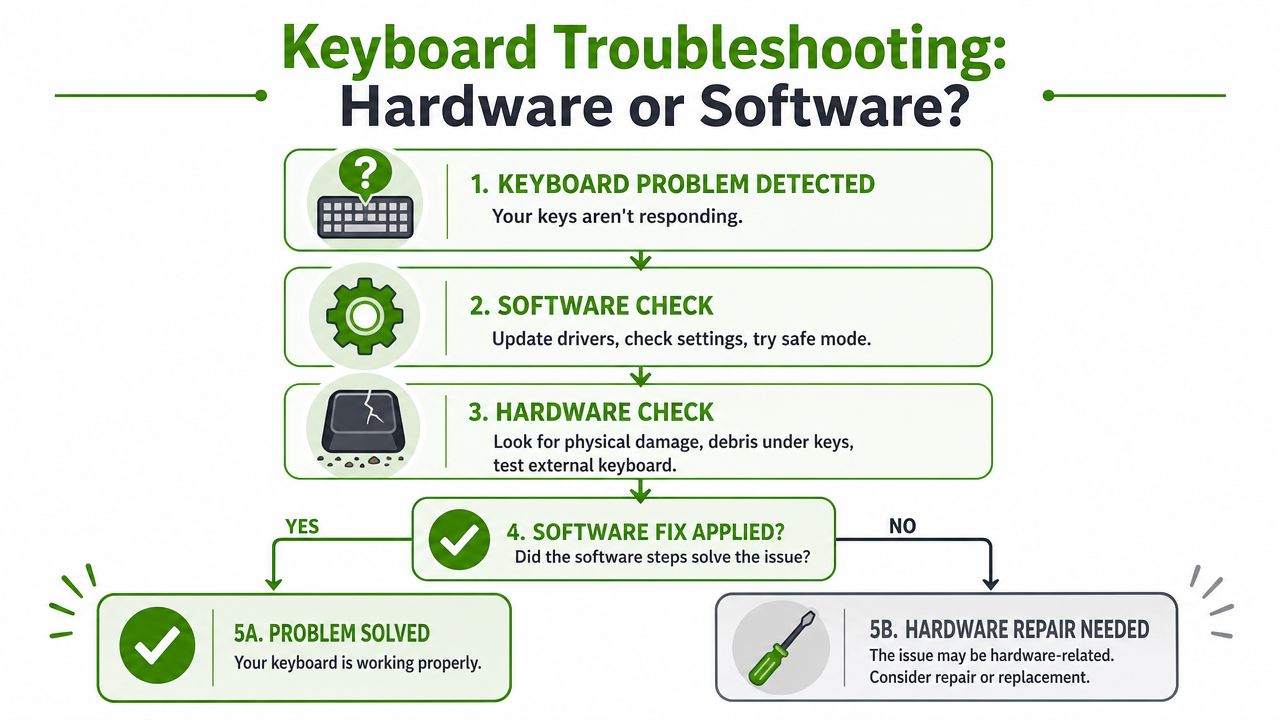
Use an external USB keyboard first. That single test tells you a lot. If the external keyboard works normally, your laptop itself is still usable, and the fault may be limited to the internal keyboard or its software path. If both keyboards behave strangely, look at system settings and broader software issues before blaming hardware.
Then check the operating system settings that can make a healthy keyboard feel broken:
-
Sticky Keys and Filter Keys: These accessibility features can delay input, ignore repeated presses, or change how modifier keys behave.
-
Driver issues: A corrupted keyboard driver can cause lag, missing input, or unusual mapping. If you need a refresher, Nerds 2 You has a clear guide on how to update drivers.
-
Recent updates or changes: If the problem started right after an update, app install, or system tweak, test in Safe Mode if your operating system allows it.
A quick symptom check helps:
| Symptom | More likely cause |
|---|---|
| One key won't press properly | Debris, broken cap, clip damage |
| Whole row dead | Hardware connection or keyboard failure |
| Keys type the wrong thing | Layout, language, or driver issue |
| Delay or missed repeats | Accessibility settings or software conflict |
If letters appear normally on an external USB keyboard, don't assume the internal hardware is dead yet. Check settings and boot-level behaviour first.
Use BIOS or UEFI to separate software from hardware
The cleanest test is BIOS or UEFI. That environment runs before your normal operating system and bypasses regular driver interference. If keys fail there too, you're likely dealing with hardware. If they work fine there but fail inside Windows or macOS, the problem is probably software, configuration, or an OS-level driver issue.
A simple process works well:
-
Shut down the laptop completely.
-
Start it and enter BIOS or UEFI using the proper key for your model.
-
Test several affected keys inside that menu.
-
Compare with normal OS behaviour after restart.
Don't skip the obvious checks while you're at it. Confirm the correct keyboard language is selected. Test the on-screen keyboard if your system has one. Restart before assuming anything permanent. Plenty of keyboards get “repaired” by nothing more exciting than disabling a setting and reinstalling a driver.
If the tests still point to hardware, then it makes sense to move to physical cleaning, key-level repair, or replacement. That's where a lot of guides jump too early.
Common Keyboard Issues You Can Fix Yourself
Once you know the issue is physical, stay in the low-risk zone first. Most DIY wins come from cleaning, reseating, or repairing a single key. That's where you get the best payoff without opening the whole machine.
Debris and minor contamination
Dust and crumbs cause more trouble than people think. A laptop keyboard has tight spacing, shallow travel, and fragile scissor or butterfly-style components on some models. One grain of grit under the wrong key can change the feel immediately.
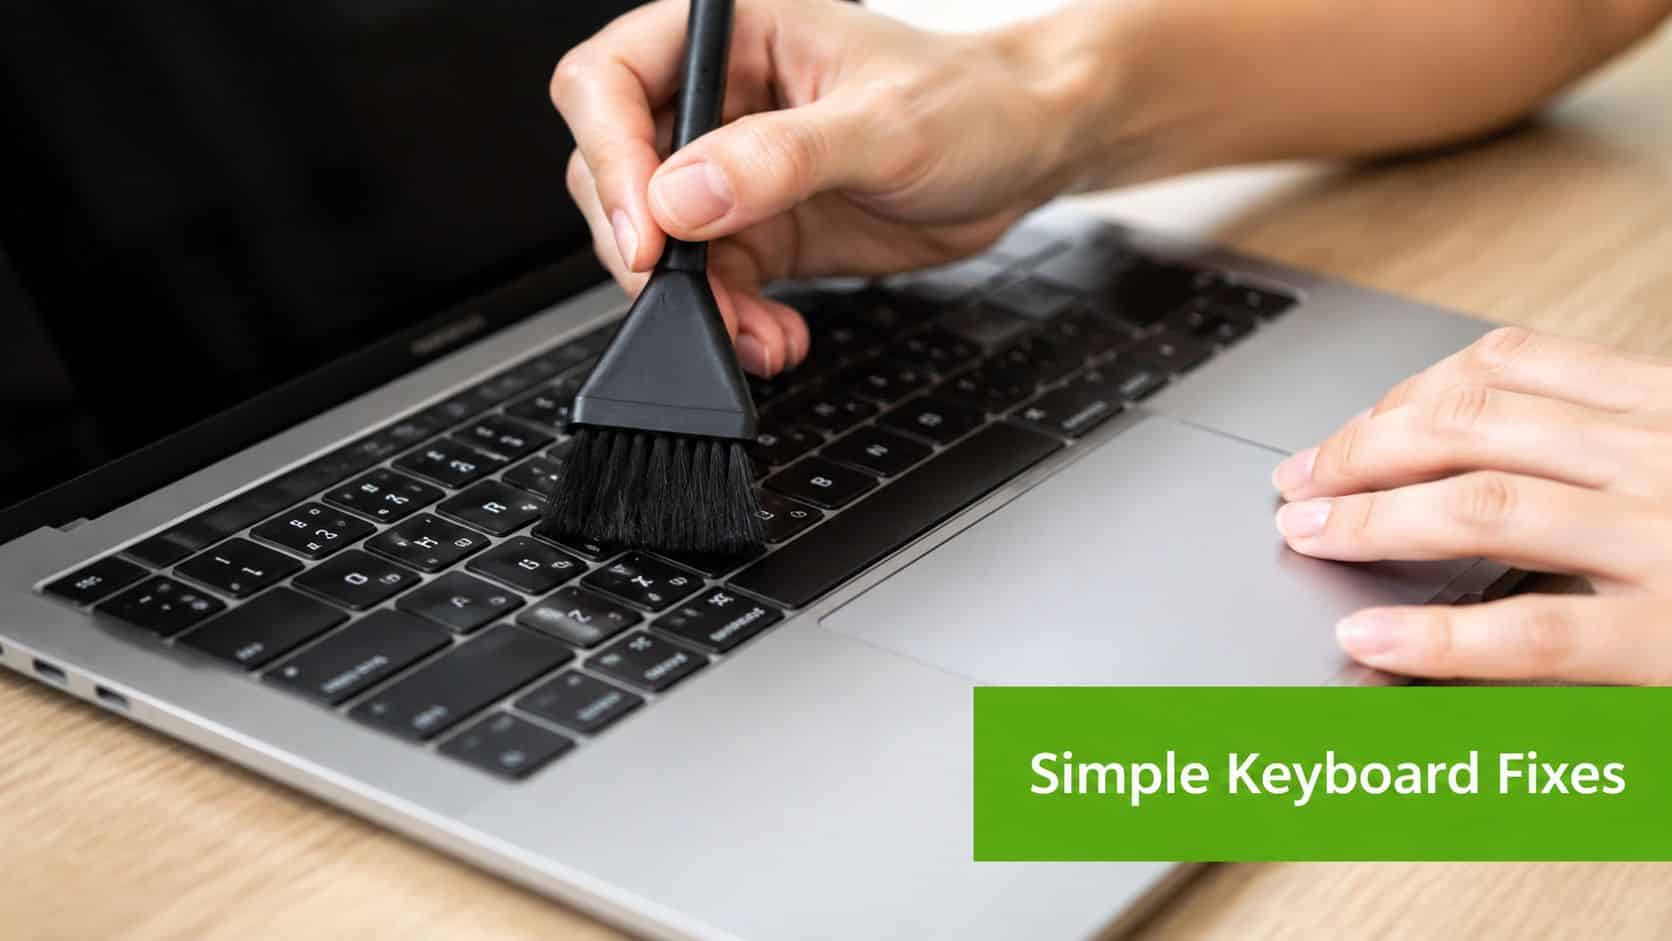
For safe cleaning, gather a few basics:
-
Compressed air: Short bursts only. Hold the can upright.
-
Soft anti-static brush: Good for loosening debris around key edges.
-
Microfibre cloth: Slightly dampened, never dripping.
-
99% isopropyl alcohol: Useful for residue, especially after a minor spill.
Use this order:
-
Power the laptop off.
-
Tilt it slightly so debris can fall away from the keyboard.
-
Use compressed air in short passes across the rows, not straight down into one key.
-
Follow with a soft brush around sticky spots.
-
For residue on top of keys, use a cloth with a small amount of isopropyl alcohol.
If you had a small spill and the machine still works, don't flood the keyboard with cleaner trying to “wash it out.” Surface cleaning is one thing. Driving liquid deeper into the assembly is another.
What usually doesn't work? Household wipes that leave moisture behind, metal tools under the caps, and spraying compressed air so aggressively that you shift debris further inside.
A single broken or missing key
This is the repair many guides ignore. They jump from “clean it” to “replace the whole keyboard,” which is overkill for older laptops with one failed key. An Edmonton Facebook user specifically looked for a shop to “repair a key and possibly clean it” on an older laptop, which highlights how often people need granular help instead of full replacement, as seen in this North Side Hub Facebook post.
A single-key problem usually falls into one of these buckets:
-
The keycap popped off: The cap may still be reusable if the hinges underneath aren't cracked.
-
The retention clip broke: The cap won't stay seated even if it looks fine.
-
The rubber dome or underlying mechanism is damaged: The key may sit crooked or fail to register.
-
The key is sticky after contamination: Cleaning may restore it if the switch area isn't corroded.
Try this method carefully:
-
Inspect before pressing: Look for broken plastic tabs. If a clip is snapped, don't force the cap back on.
-
Match orientation: Laptop keycaps aren't symmetrical. The hinge usually installs in one direction only.
-
Seat the mechanism first: If the scissor clip came apart, reconnect it to the keyboard frame before attaching the keycap.
-
Press gently at the centre: You're listening and feeling for a soft snap, not a hard crunch.
One missing key doesn't automatically justify full laptop computer keyboard repair. Often the expensive part isn't the key. It's the unnecessary disassembly.
Space bars, Enter keys, and larger shift keys are trickier because they often use metal stabilizer bars. Those are still fixable, but they demand patience and a clear view of how the parts align before you push anything back into place.
If the cap won't reseat cleanly, stop there. Forcing it usually breaks the mount points and turns a key-level repair into a full keyboard job.
The Full Keyboard Replacement Procedure
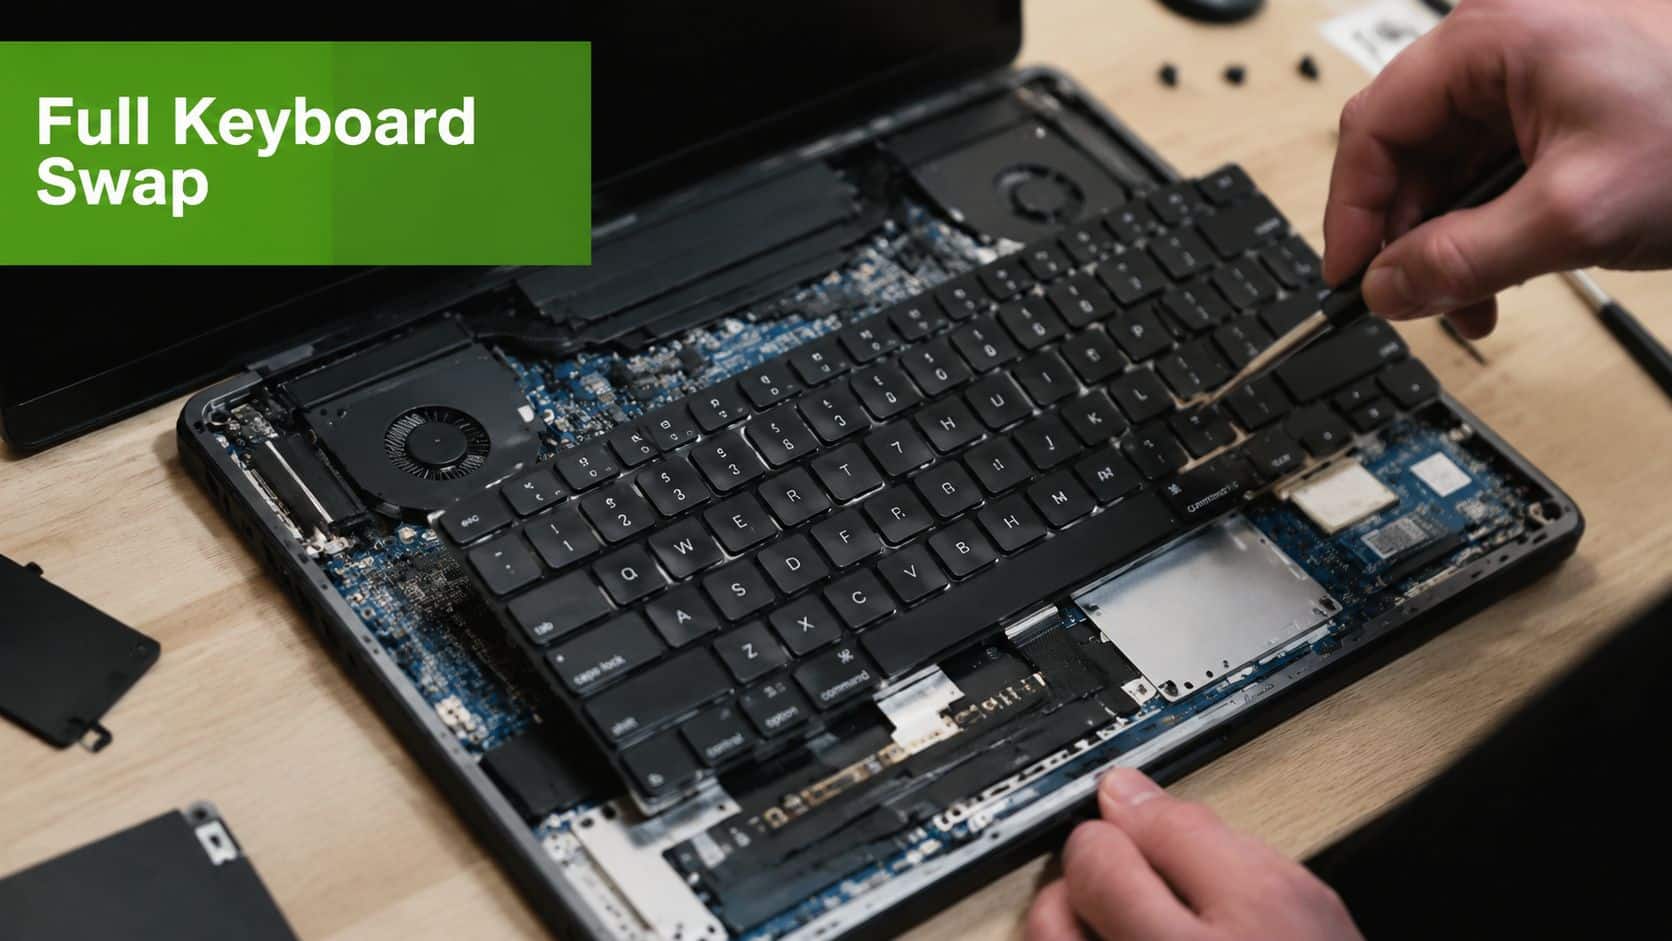
A full replacement is the point where DIY stops being casual. You need the right part, the right tools, and a calm work surface. People damage ribbon cables, crack trim, or short the board when they rushed the prep.
Get the right part before opening anything
Don't order by laptop brand alone. Order by the exact model, sub-model, and keyboard layout. A keyboard that “looks the same” can still have a different ribbon length, screw pattern, backlight connector, or frame design.
Before disassembly, line up:
-
Plastic pry tools
-
Small precision screwdrivers
-
Tweezers
-
A magnetic project mat or screw organiser
-
Good lighting
-
The correct replacement keyboard
If you're working on Apple hardware, model-specific complexity can change the decision completely. For people comparing repair paths on Macs, this overview of MacBook keyboard replacement service gives useful context on how involved those repairs can become. For local Apple-specific help, there's also a dedicated MacBook keyboard repair service page.
Disassembly and ribbon cable handling
The most important rule comes before the first screw. Completely power down the laptop, unplug it, and remove the battery if possible. According to HP's hardware replacement guidance, that protocol reduces the risk of shorting the motherboard by an estimated 92%, and the same HP guidance notes that 38% of DIY keyboard replacement failures come from using excessive force during the job, especially around clips and cables, as explained in HP's article on how to replace a laptop keyboard.
That's the difference between a repair and a much bigger bill.
A general replacement flow looks like this:
- Shut down fully and isolate power
Sleep mode isn't enough. Disconnect the charger. If the battery is removable, take it out. If it's internal, disconnect it as soon as you safely can after opening the machine.
- Access the keyboard area
Some laptops let you release the keyboard from the top with plastic clips. Others require removing the bottom cover, battery, and upper case components first. There is no universal shortcut here.
- Release the keyboard ribbon cable
This is the delicate part. Most connectors use a flip-up or slide-lock latch. Lift the latch gently with a plastic tool, then slide the ribbon out. Never yank the cable while the lock is engaged.
- Remove the old keyboard
Depending on design, this may involve screws, tabs, or a top-case assembly. Keep parts organized in removal order.
- Install and reconnect
Seat the new keyboard properly before reconnecting the ribbon. Make sure the cable is straight and fully inserted before closing the latch.
- Test before final reassembly
If your model allows it, connect enough components to power on and test the keyboard before replacing every screw and trim piece.
Excess force causes more failed DIY keyboard jobs than bad intentions do. Slow hands beat strong hands every time.
When model design changes the job
Some laptops make keyboard replacement fairly direct. Others bury the keyboard under layers of components. Business-class systems can be friendly to work on. Ultra-thin consumer models often aren't. MacBooks can be their own category entirely, with top-case design and internal layout making the job much more involved than people expect.
That's why a “model-agnostic” guide only gets you so far. The logic stays the same, but the risk changes with the chassis. If your keyboard is riveted into a top case, if the battery sits in the way, or if the palm rest has to come apart first, the job is no longer just a keyboard swap. It becomes partial laptop reconstruction.
A good stopping rule is simple. If you open the device and realize you can't clearly identify the keyboard connector, battery connector, and keyboard fasteners without guessing, stop and reassess before you break a clip or tear a cable.
Cost Time and When to Call Nerds 2 You in Edmonton
A keyboard repair decision in Edmonton usually comes down to value, not just possibility. Plenty of keyboards can be replaced. That doesn't mean replacing them is smart on every machine.
What the Edmonton numbers mean in practice
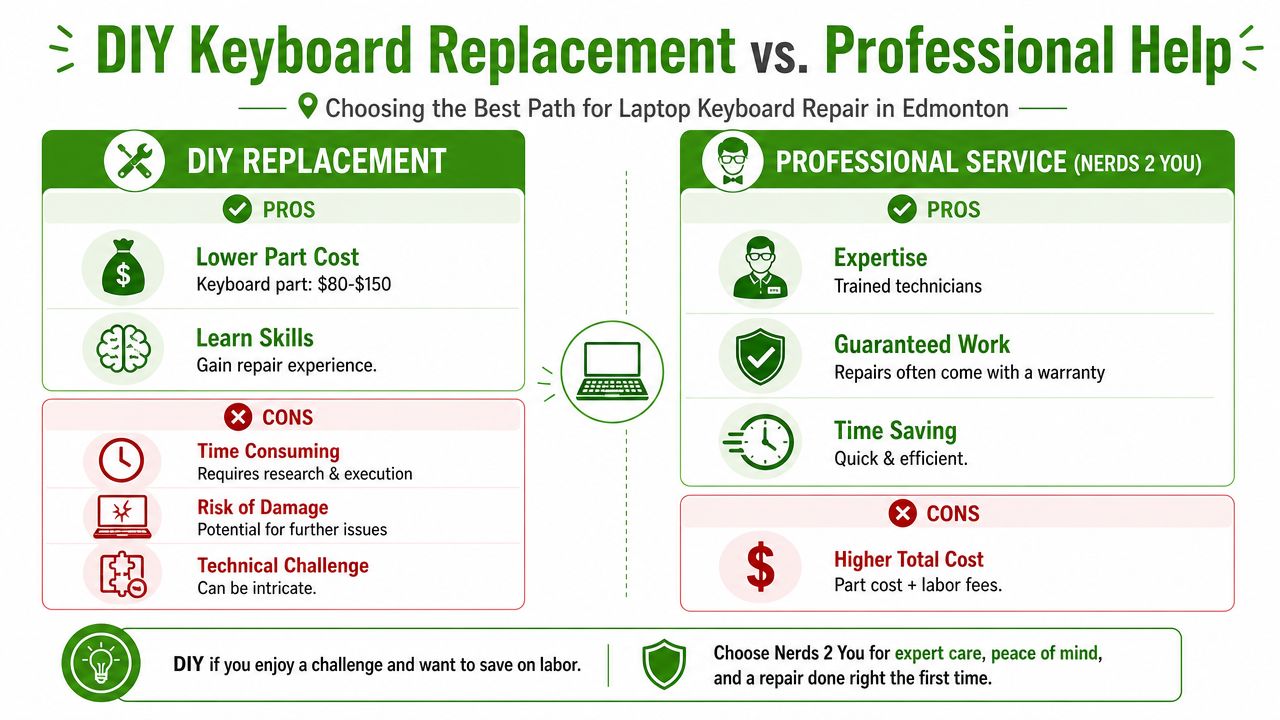
In the Edmonton region, a professional laptop keyboard replacement typically costs $200 to $400, and local discussion around repair pricing notes that this often makes repair uneconomical compared with buying another entry-level machine, especially for lower-value devices, as discussed in this Edmonton laptop repair costs thread.
That trade-off matters more than people expect. If your laptop is older, basic, or already showing other issues, a keyboard replacement can feel like throwing good money after bad. If it's a higher-end business laptop or a machine you rely on daily, the equation changes. In those cases, preserving the device, setup, and workflow may be worth more than the raw repair cost.
Time matters too. DIY can be cheaper on paper, but it costs your own time, your attention, and the risk of creating extra damage. Professional service costs more, but it removes a lot of uncertainty. For some households and small businesses, that convenience is the deciding factor.
If you're comparing broader service options, this page on computer service and repair gives a sense of the kind of on-site support available in Edmonton.
DIY vs Professional On-Site Repair in Edmonton
| Factor | DIY Repair | Nerds 2 You On-Site Service |
|---|---|---|
| Cost control | Lower direct out-of-pocket cost if the issue is minor and you already have tools | Higher total cost because you're paying for labour and convenience |
| Time | Research, part matching, opening the device, testing, reassembly | Someone comes to you and handles diagnosis and repair workflow |
| Risk | You carry the risk of broken clips, torn ribbons, and incorrect parts | A technician handles the delicate work |
| Best fit | Single-key issues, cleaning, confident hobby work | Multi-key failure, spill follow-up, business-critical laptops |
| Convenience | You manage everything yourself | On-site help avoids a shop trip |
Two practical points matter here. Nerds 2 You does not provide remote services. Keyboard problems are hands-on problems, so that makes sense. Nerds 2 You doesn't provide full MSP services but does provide ongoing support and network monitoring for small and medium businesses.
Call for help when any of these apply:
-
Your laptop is business-critical: Downtime costs more than the repair hassle.
-
The keyboard failed after liquid exposure: Corrosion can spread beyond what surface cleaning fixes.
-
You're facing major disassembly: If the battery, top case, or multiple internal layers must come out, the job is no longer beginner-friendly.
-
You already tried a safe fix and it didn't hold: Repeating the same DIY step rarely changes the outcome.
Keeping Your Keyboard Working Flawlessly
Prevention is boring until you've priced out a replacement. Then it's the cheapest habit you can build. Keep drinks away from the laptop. Don't eat over the keyboard if you can help it. Use compressed air now and then to clear dust before keys start sticking.
A light keyboard cover can help in dusty spaces, but don't use anything that traps moisture against the keys. If you work long hours and want a fallback when typing becomes difficult, accessibility tools can help bridge the gap. This overview of Voice Control Pro's input options is useful if you need alternatives while deciding whether to repair or replace.
The takeaway is simple. Start with diagnosis. Try the low-risk fixes first. Respect the point where the job becomes internal hardware work. That's where good judgment matters more than confidence.
If you need local, hands-on help, Edmonton users are usually best served by someone who can inspect the machine in person and tell the difference between a fixable key problem and a keyboard that's reached the end of the line.
If your keyboard issue has moved past cleaning and simple key repair, Nerds 2 You Edmonton can come to your home or office and handle the problem on-site. They've served the Edmonton area since 2009, work on PCs and Macs, and focus on practical, in-person support without the hassle of hauling your laptop to a shop.
Contact Nerds 2 You for quality professional service
Experience the difference with our dedicated team of experts ready to assist you. Whether you need immediate support or have questions about our services, we are here to help. Reach out today and let us provide you with the reliable service you deserve. Your satisfaction is our priority and we guarantee a prompt response to all inquiries.
Discover more from Nerds 2 You
Subscribe to get the latest posts sent to your email.