
You press the power button, make coffee, and still wait for the login screen. Once the desktop finally appears, opening Outlook, a browser, or an accounting application adds another delay. That pattern is common on Edmonton laptops and office desktops that still rely on an ageing hard drive, and an SSD upgrade often addresses the storage bottleneck without replacing the entire computer.
The improvement is practical rather than mysterious. A solid-state drive can make booting, application launches, file searches, and general navigation feel much more responsive. It also operates without noise because it has no spinning platters. The important part is choosing a drive that fits the computer, protects the existing data, and suits the workload. The fastest benchmark result isn't automatically the best purchase for a home office or small business.
Table of Contents
- Why an SSD Upgrade Still Pays Off in 2026
- How to Choose the Right SSD for Your Laptop or Desktop
- Compatibility Checks Backups and Cloning Decisions
- Installing Your New SSD and Configuring Boot Settings
- Verifying Performance and Troubleshooting Common Issues
- When to Call a Mobile Technician in Edmonton
Why an SSD Upgrade Still Pays Off in 2026
A laptop can still have a capable processor, enough memory, and a good screen, yet feel slow because its hard drive spends too long locating data. Replacing that drive with an SSD improves the storage layer used constantly for startup files, applications, temporary data, and documents.
On Edmonton home-office systems, this often avoids an unnecessary computer replacement. If the motherboard, display, battery, and processor remain suitable, a planned migration can preserve email settings, application licences, and personal files while removing the storage bottleneck.
The upgrade changes everyday friction
An SSD upgrade is most noticeable in repeated tasks:
- Starting the computer: Startup files load with much lower latency than they do from an ageing mechanical drive.
- Opening applications: Office programs, browsers, bookkeeping tools, and creative software generally launch with less waiting.
- Finding files: Searches and folder browsing feel more responsive because the system is not waiting for a physical drive head to move.
- Working quietly: An SSD has no spinning disk mechanism, so it removes the noise and vibration of a traditional hard drive.
- Extending useful life: Replacing one sluggish or failing component can cost less than replacing an otherwise serviceable laptop or desktop.
The Canadian SSD market reflects wider adoption of flash storage. One estimate places the Canadian solid-state drive market at USD 4.5 billion in 2025, projecting USD 11.2 billion by 2031 and a 15.8% CAGR, as described in this Canadian SSD market estimate. Those figures do not mean every user needs an expensive Gen4 or Gen5 drive. They do show that storage replacement and expansion are now ordinary maintenance choices.
Alberta's computer infrastructure document also records older PC replacement patterns, a reminder that component upgrades can extend the useful life of systems already in service.
Practical rule: Upgrade the storage when the computer is otherwise stable. Replace the whole system when the processor, memory, battery, display, or motherboard prevents the work you need to do.
Speed is only one part of the decision. For a home office, endurance and dependable capacity may matter more than the fastest benchmark, especially when the computer handles documents, email, accounting files, and daily backups. A larger, reasonably fast SSD can offer better value in Canada than paying extra for performance the workload cannot use.
Keep the old drive when its condition allows. It can serve as a rollback option if cloning, licensing, or boot configuration goes wrong, rather than being discarded immediately after the upgrade. If the slowdown turns out to be software rather than storage, performance optimization support may address the problem without changing the drive.
For Edmonton homes and small businesses, choose the drive that fits the computer, holds the data comfortably, suits the workload, and leaves a safe recovery path. That decision matters more than chasing the highest advertised speed.
How to Choose the Right SSD for Your Laptop or Desktop
Start with the computer, not the product listing. A laptop may accept a 2.5-inch SATA SSD, an M.2 SATA drive, or an M.2 NVMe drive, and those formats aren't interchangeable just because they look similar in an online photograph. Check the manufacturer's service manual, the existing drive, or the motherboard documentation before ordering.
A 2.5-inch SATA drive uses a data connection and a power connection in a desktop or laptop bay. An M.2 drive is a narrow circuit board secured directly to the motherboard, but M.2 describes the physical shape, not the communication protocol. An M.2 slot may support SATA, NVMe, or both. The notch pattern, slot markings, firmware support, and documented drive length all matter.
SATA and NVMe serve different buyers
| Feature | SATA SSD | NVMe PCIe SSD |
|---|---|---|
| Typical connection | 2.5-inch bay or M.2 SATA slot | M.2 PCIe slot |
| Best fit | Older laptops, desktops, office systems | Newer laptops, desktops, and demanding workflows |
| Installation concern | Requires correct cables in a 2.5-inch bay | Requires compatible M.2 keying, length, and PCIe support |
| Everyday office value | Often sufficient for browsing, email, documents, and bookkeeping | Useful, but peak throughput may exceed the workload |
| Main buying priority | Capacity, warranty, and health monitoring | Compatibility, thermals, capacity, and endurance |
For everyday browsing, email, Microsoft 365, documents, and moderate photo work, a good SATA SSD can be a sensible choice. NVMe is the natural option when the computer supports it, particularly for large file transfers, virtual machines, media work, or other storage-heavy tasks. PCIe Gen4 is widely treated as a practical middle ground in Canadian buying advice, but compatibility and price still decide whether it makes sense for a particular machine.
Capacity is a Canadian value decision
Capacity should be based on used space plus working room, not the size of the old drive alone. Review the source drive's actual contents, remove unnecessary files, and leave room for operating-system updates, application caches, local documents, and future growth.
Canadian pricing can vary sharply. One daily tracker reports a median internal SSD price of CA$325.38, while another Canadian buying reference highlights a budget 1TB SATA SSD at CA$89.99, as shown in this Canada-focused SSD pricing and upgrade guide. Those figures aren't a universal quote for every model, but they demonstrate why comparing value per terabyte matters more than selecting a drive from a benchmark chart.
A larger, sensibly priced SATA SSD may serve an office laptop better than a smaller high-end NVMe model. Conversely, a video editor with large project files may benefit from NVMe and greater capacity. The right SSD is the one that matches the computer and the workload, not the one with the most impressive specification.
Endurance matters without becoming a distraction
SSDs wear through write activity, so buyers should consider TBW, DWPD, warranty terms, and SMART health. Moderate office workloads can often continue for many years, and many drives are replaced for capacity or performance reasons before write endurance becomes the limiting factor. That makes backups and health checks more important than chasing the newest interface.
A Canada-facing SSD guide explains why non-gaming buyers should weigh endurance and SMART health alongside speed in this SSD reliability and replacement overview. For a home office, a reputable drive with suitable capacity and visible health data is usually a stronger decision than a premium model whose throughput the user will rarely exploit.
Compatibility Checks Backups and Cloning Decisions
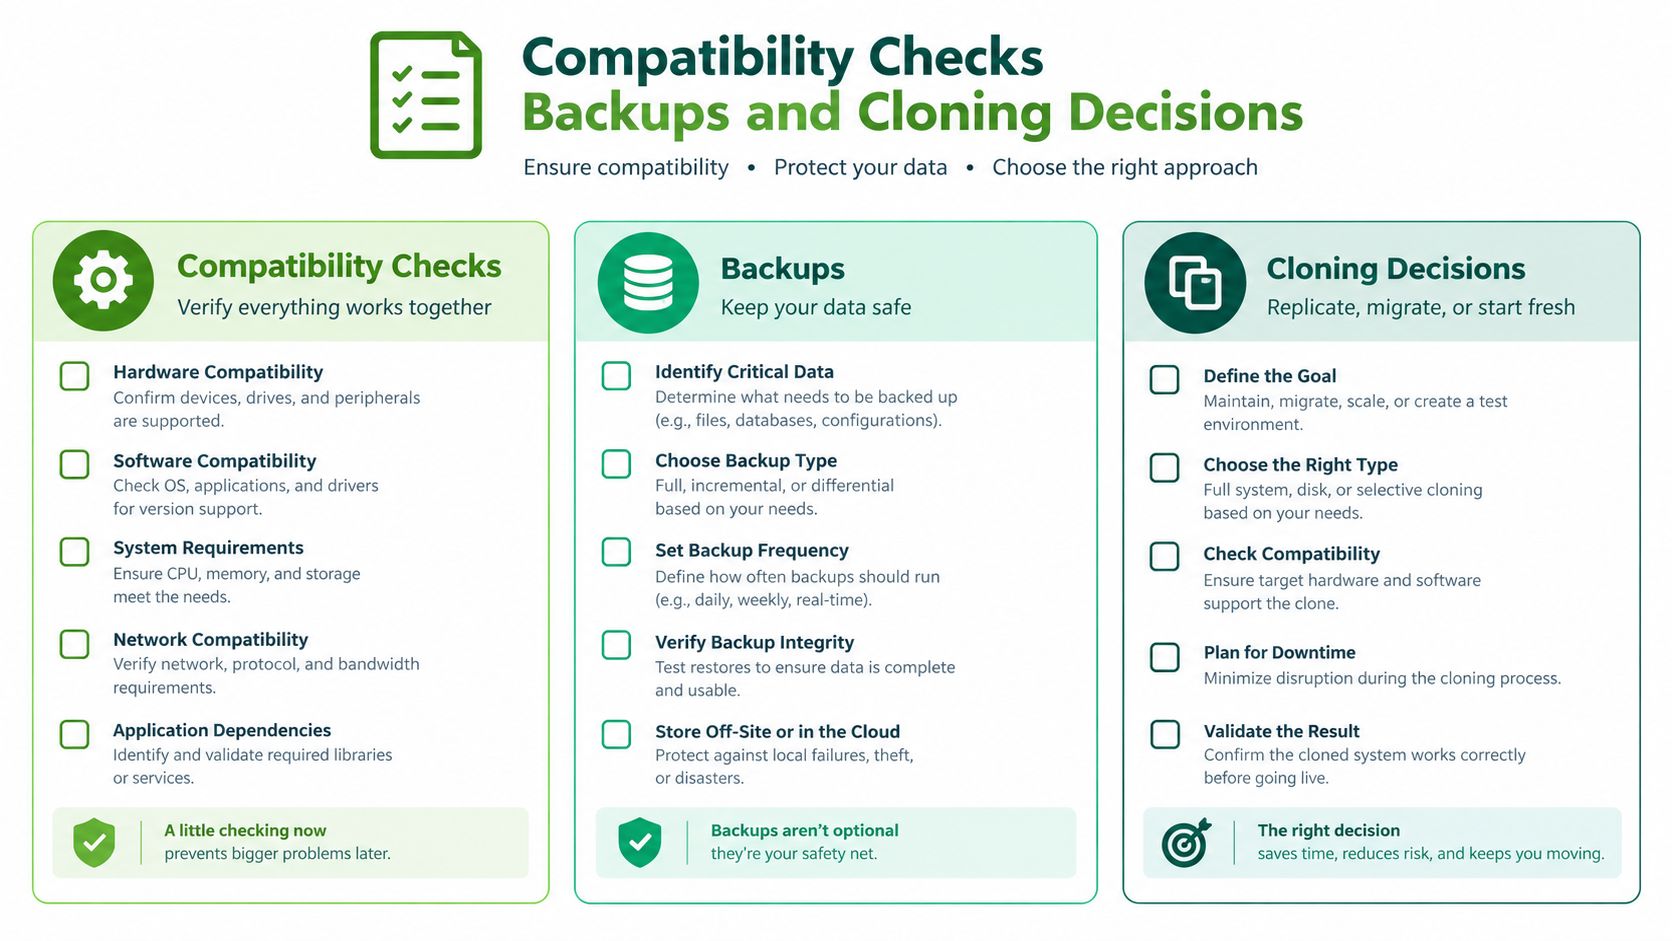
The safest installation begins before you open the case. Confirm the replacement drive's physical dimensions, interface, and capacity while the existing system still works. This is also the point to decide whether you want a clone that preserves the current environment or a clean installation that removes accumulated software and configuration problems.
Confirm the hardware before buying
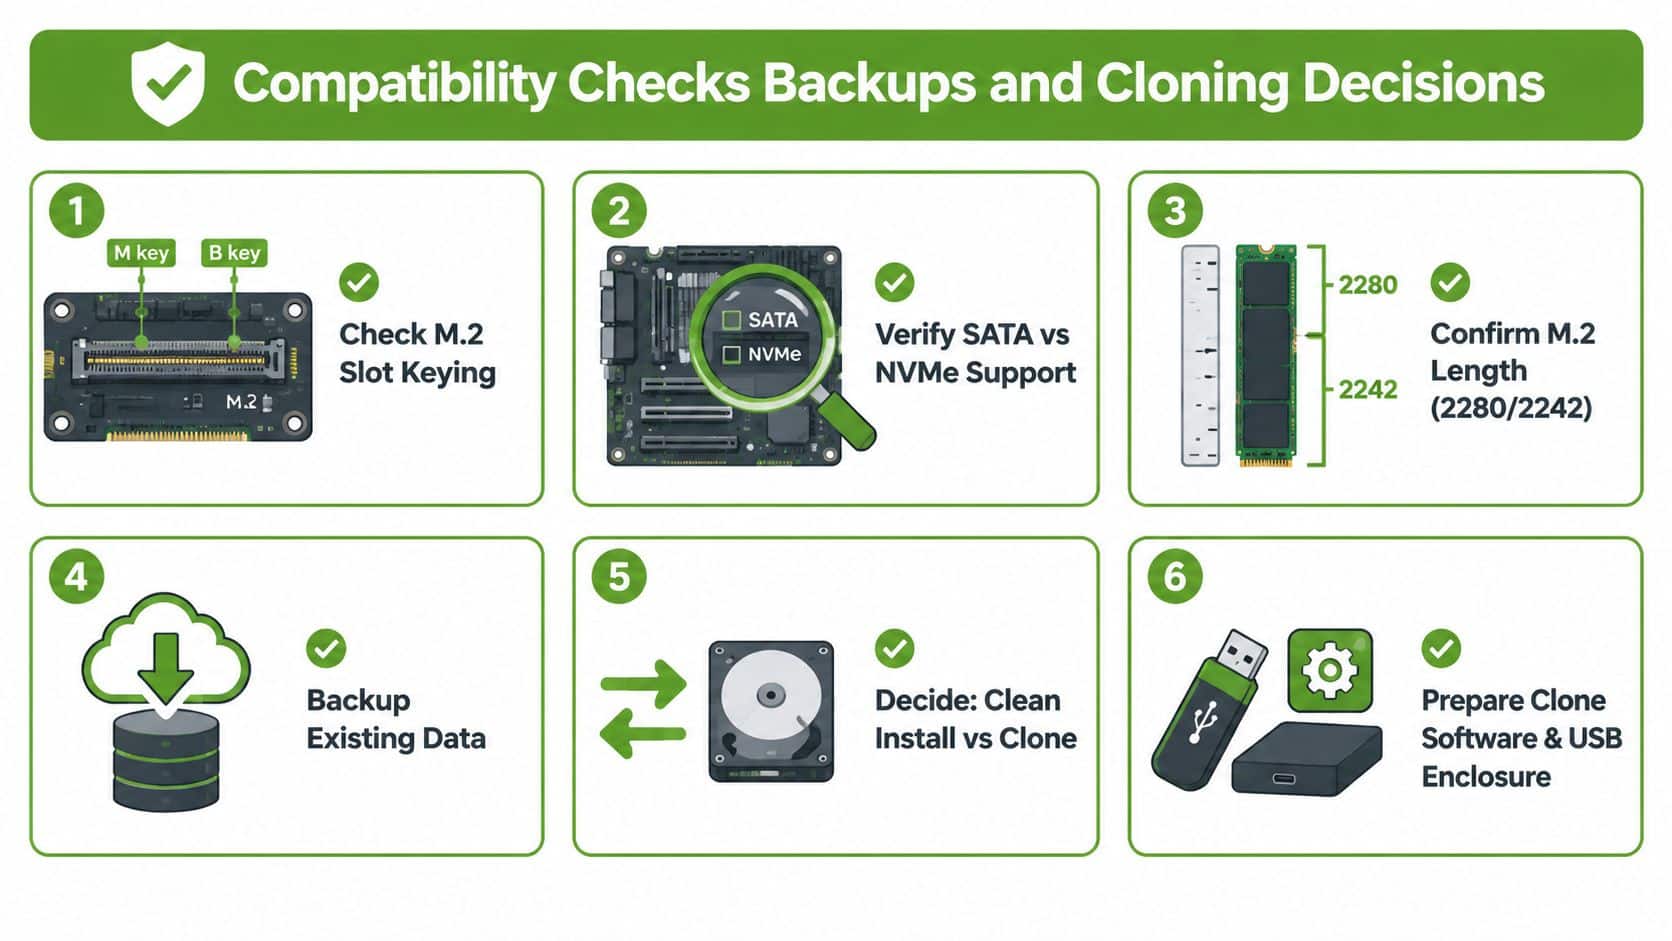
Check the exact computer model and look for the maintenance guide. Then verify:
- Slot and protocol: Determine whether the M.2 slot accepts SATA, NVMe, or both. A physically fitting drive can still be electrically incompatible.
- Keying: Compare the notch pattern on the existing module with the replacement and the motherboard slot.
- Length: Confirm whether the system takes an M.2 2280, 2242, or another length. A screw position that doesn't match can leave the drive unsecured.
- Capacity: Compare the new SSD's usable space with the source drive's used space, not just its advertised capacity.
- Boot mode: Identify whether the installation uses UEFI with GPT or Legacy mode with MBR. The replacement must remain aligned with the system's boot configuration.
A desktop has more room to work, but it still needs the correct SATA data cable, power lead, mounting position, or PCIe adapter. Ultrabooks and compact laptops are less forgiving because the drive, battery, thermal shield, and retaining screw may be tightly arranged.
Protect the data before cloning
Check the source drive's health first. If it is reporting errors, freezing, disappearing, or making unusual mechanical sounds, cloning can place additional stress on a failing device. Copy critical documents to a separate destination before migration, and consider reviewing practical guidance on securing your data with Micro CRM as part of a broader backup routine.
The recovery risk is serious. One Canada-based recovery source reports that failed SSDs may offer only about 30–40% of sectors readable without errors, leaving roughly 60–70% unreadable during some recovery attempts, as documented in this SSD recovery report. That is why a backup made before the swap is more valuable than confidence that the clone software will handle every problem.
Before touching the drive: Back up irreplaceable files, verify that the backup opens, and keep the original drive untouched after cloning.
Choose cloning or a clean installation
Cloning preserves the existing operating system, applications, user profile, and many settings. It's convenient when the system is stable and the new SSD has enough usable capacity. A USB enclosure or suitable adapter lets you connect the new drive before opening the computer.
A clean installation is preferable when Windows or macOS has years of unwanted applications, recurring errors, malware concerns, or an uncertain configuration. It takes more time because programs, accounts, drivers, and preferences must be restored, but it can leave the computer easier to maintain.
Before cloning, pause BitLocker or FileVault as appropriate, back up critical files, and verify the clone rather than assuming completion means success. Keep the old drive as a rollback path until the replacement boots, applications open, files are present, and the system remains stable through normal use. This external hard drive backup guide can help you choose a separate destination for the safety copy.
Installing Your New SSD and Configuring Boot Settings
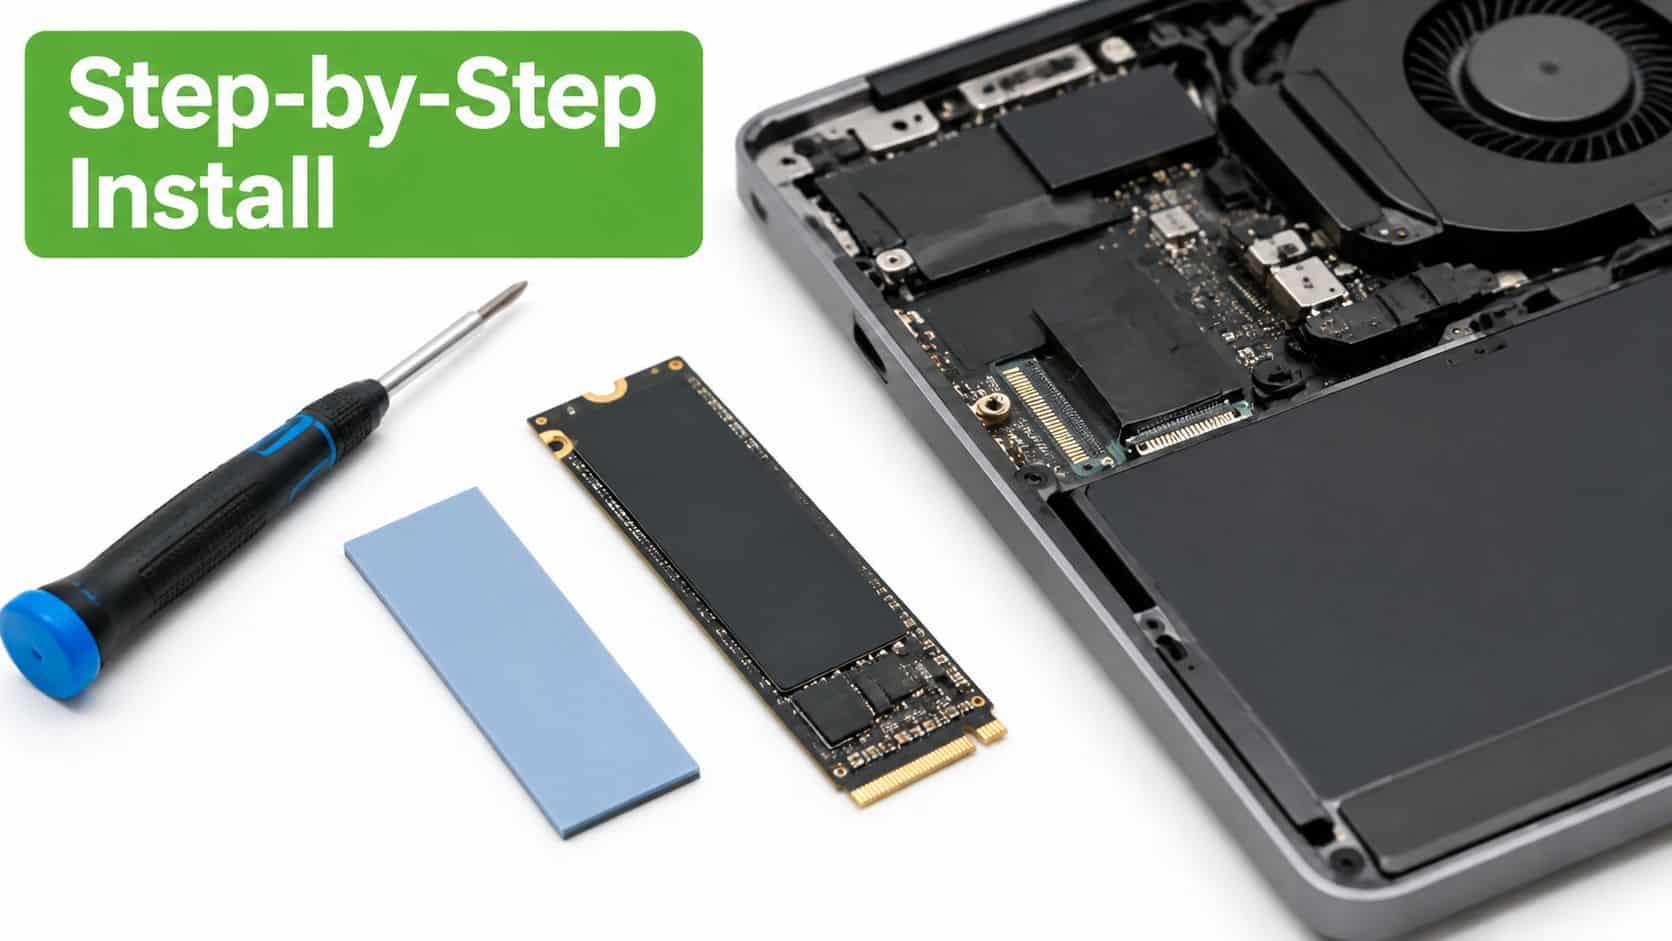
Physical installation is straightforward when the computer's documentation is clear, but small mistakes can create confusing symptoms. Work on a clean, stable surface, shut the computer down fully, disconnect its power, and use a screwdriver that fits the fasteners. Avoid forcing a connector or sliding a module at an angle.
Prepare the laptop or desktop
For a laptop, remove the bottom cover according to the service guide. If access allows it, disconnect the battery before removing the storage module. Take care around ribbon cables, clips, speakers, and antenna wires. A thin plastic pick is safer than a metal blade for separating clipped panels.
For a desktop, switch off the power supply, unplug the cable, and press the power button briefly to discharge residual power. Ground yourself before handling the drive, then choose the correct installation position. A 2.5-inch SATA SSD needs secure mounting plus both data and power connections. An M.2 SSD slides into its socket at a shallow angle and is then pressed down and secured with the correct retaining screw.
Use these checks during the physical swap:
- Match the connector: The drive should slide into place smoothly. Resistance usually means the slot, keying, or angle is wrong.
- Secure the module: Don't leave an M.2 drive floating or bend it to meet the screw.
- Reuse thermal parts correctly: If the original drive has a thermal pad or shield, place it back as designed and avoid covering contacts.
- Inspect cables: A SATA data cable that is loose at either end can make a healthy drive appear dead.
- Keep the old drive labelled: Store it safely instead of formatting it immediately.
This complete desktop hard-drive replacement guide provides another practical reference for the physical process.
Make the firmware see the new drive
Power on and enter the BIOS or UEFI setup using the computer's manufacturer-specific key. First check whether the new SSD appears in the storage information. If it isn't listed, shut down and recheck the seating, cables, adapter, slot compatibility, and power connection before changing boot settings.
If the drive appears but the computer doesn't start, review the boot configuration:
- Match the installation mode: A cloned UEFI/GPT installation needs compatible UEFI settings. A Legacy/MBR installation may require Legacy support, depending on the computer.
- Set the boot entry: Choose the new SSD or its operating-system boot manager as the first boot device.
- Avoid unnecessary changes: Don't switch storage modes casually. A change such as AHCI configuration can prevent an existing installation from loading if the operating system wasn't prepared for it.
- Resume encryption carefully: Restore BitLocker or FileVault only after confirming that the new installation boots and the recovery key is available.
First-boot check: Confirm the new drive is listed, the correct boot manager is first, and the old drive remains available as a rollback option.
Verifying Performance and Troubleshooting Common Issues
A successful clone isn't proven by a completion message. Shut the system down, remove or disconnect the old drive when appropriate for the test, and confirm that the computer starts from the replacement. Check the user profile, documents, applications, browser settings, and any locally stored business data before treating the migration as finished.
Use simple observations first. The computer should boot with less waiting, common applications should open more promptly, and file browsing should feel consistent rather than intermittently freezing. Windows users can review drive status through available system tools and manufacturer utilities, while Mac users can use Disk Utility and the drive's own health information where supported.
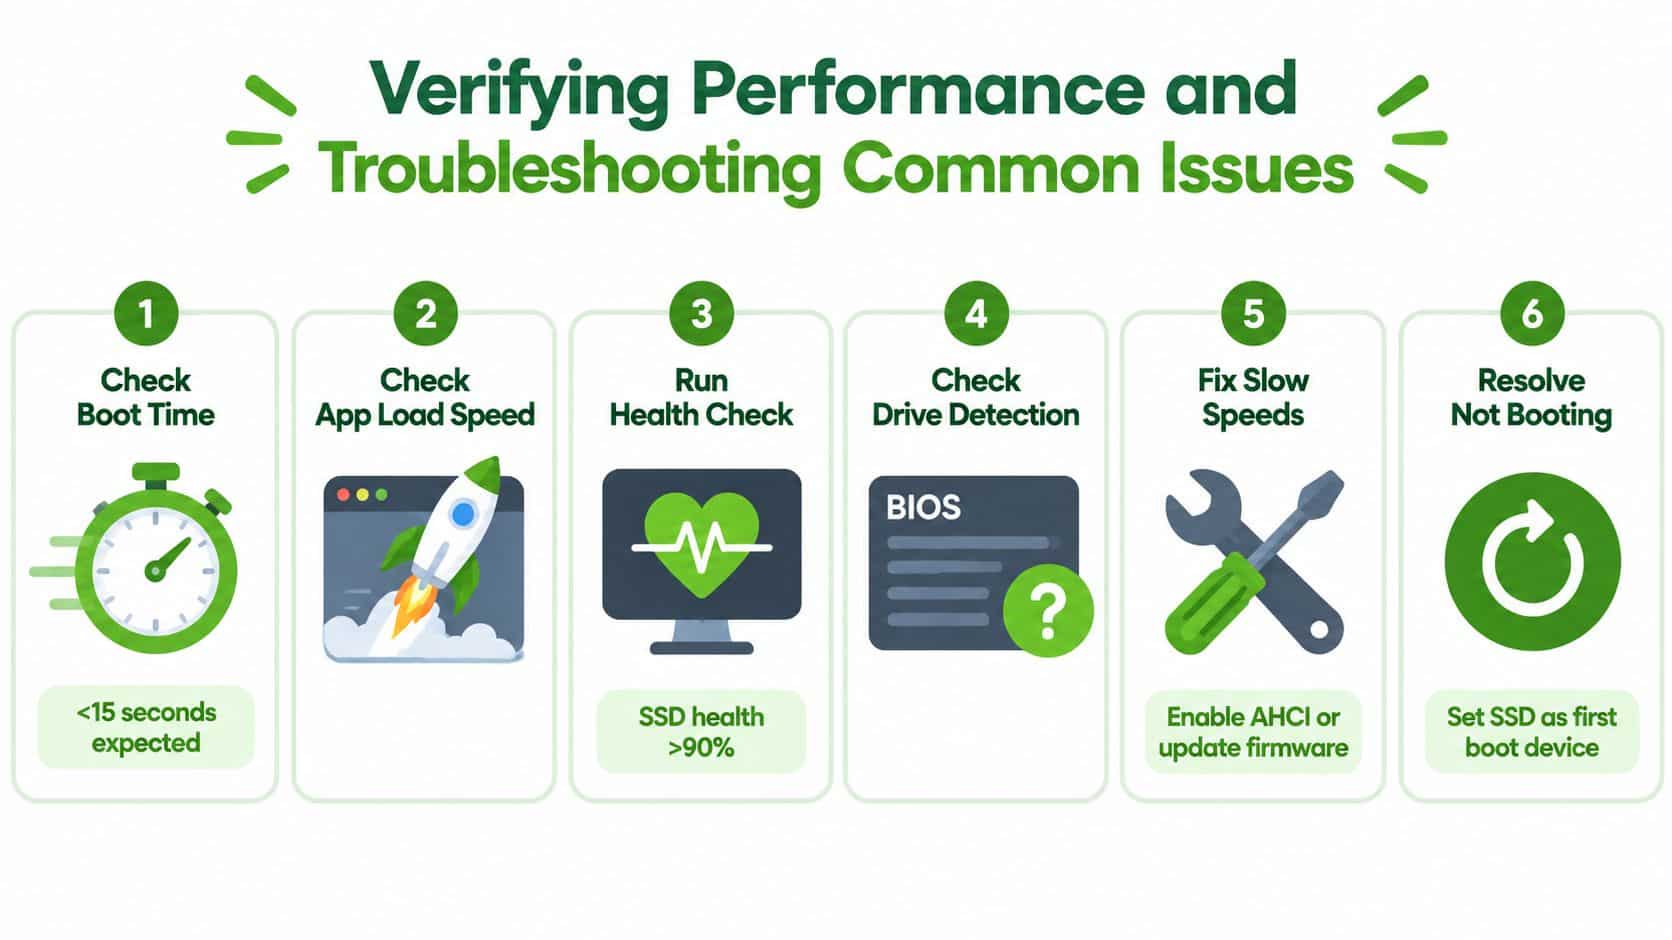
Use the symptom to narrow the fault
| Symptom | Likely area to check | Practical response |
|---|---|---|
| SSD absent in BIOS | Seating, cable, slot support, adapter, or power | Shut down and reseat the drive, then confirm documented compatibility |
| Clone completes but won't boot | Boot mode, boot order, or damaged boot files | Match UEFI/GPT or Legacy/MBR and repair the boot environment |
| Drive appears slower than expected | Wrong slot, interface limit, firmware, or thermal behaviour | Confirm the slot protocol and install the manufacturer's firmware tool |
| Files are missing after migration | Incomplete clone or wrong user profile | Stop using the old drive as a backup source and compare folders carefully |
| System freezes during cloning | Source-drive health or connection instability | Stop, protect the data, and assess the source drive before repeating |
Partition alignment and an incorrect clone target can also produce poor results. If the SSD is detected but applications still hesitate, confirm that the operating system is running from the new drive rather than the old one. On a desktop with multiple storage devices, the boot order can make this mistake surprisingly easy to miss.
Do not format the old drive on the first successful boot. Use the computer normally, open the applications that matter, check shared folders and backups, and make sure encryption and account access behave properly. Only after that stability check should the old drive become secondary storage, a securely erased device, or a retained emergency rollback.
When to Call a Mobile Technician in Edmonton
DIY makes sense when the computer has an accessible drive bay, the service documentation is clear, the replacement is confirmed compatible, and you have a verified backup. It becomes a poor bet when the laptop has fragile clips, hidden screws, a tightly fitted battery, uncertain encryption, or business data that cannot be risked.
On-site help is particularly useful when the source drive is showing health warnings, the clone fails, the new SSD isn't detected, or the system reaches firmware but not the operating system. A technician can also handle the less visible work after the swap, such as checking user profiles, confirming backups, reconnecting printers, and testing network access.
Nerds 2 You does not provide remote services, and it does not provide full MSP services. For small and medium businesses, it does provide ongoing support and network monitoring, which can help with continuing maintenance and infrastructure oversight after a hardware upgrade. The company handles most major hardware repairs on site, but it does not provide board-level repairs, so a damaged motherboard or logic board may require a specialist service outside that scope.
A network-monitoring arrangement is different from one-time repair. Canadian service descriptions commonly include continuous oversight of devices, bandwidth, and connectivity, with proactive alerts intended to identify problems before they become outages. That kind of ongoing support can suit a small office that needs help maintaining reliable systems without outsourcing every part of its IT administration.
For an Edmonton laptop or desktop, prepare the model number, current storage size, approximate used space, backup status, and any encryption details before booking. That information helps the technician bring the right SSD, enclosure, cables, and tools, and it makes the visit more predictable.
Nerds 2 You Edmonton provides on-site SSD upgrades, hardware repairs, data-transfer assistance, backup guidance, and network support for homes and small or medium businesses. Visit Nerds 2 You Edmonton to arrange an appointment for a compatible drive assessment, safe migration, or post-upgrade troubleshooting.
Contact Nerds 2 You for quality professional service
Experience the difference with our dedicated team of experts ready to assist you. Whether you need immediate support or have questions about our services, we are here to help. Reach out today and let us provide you with the reliable service you deserve. Your satisfaction is our priority and we guarantee a prompt response to all inquiries.
Discover more from Nerds 2 You
Subscribe to get the latest posts sent to your email.