
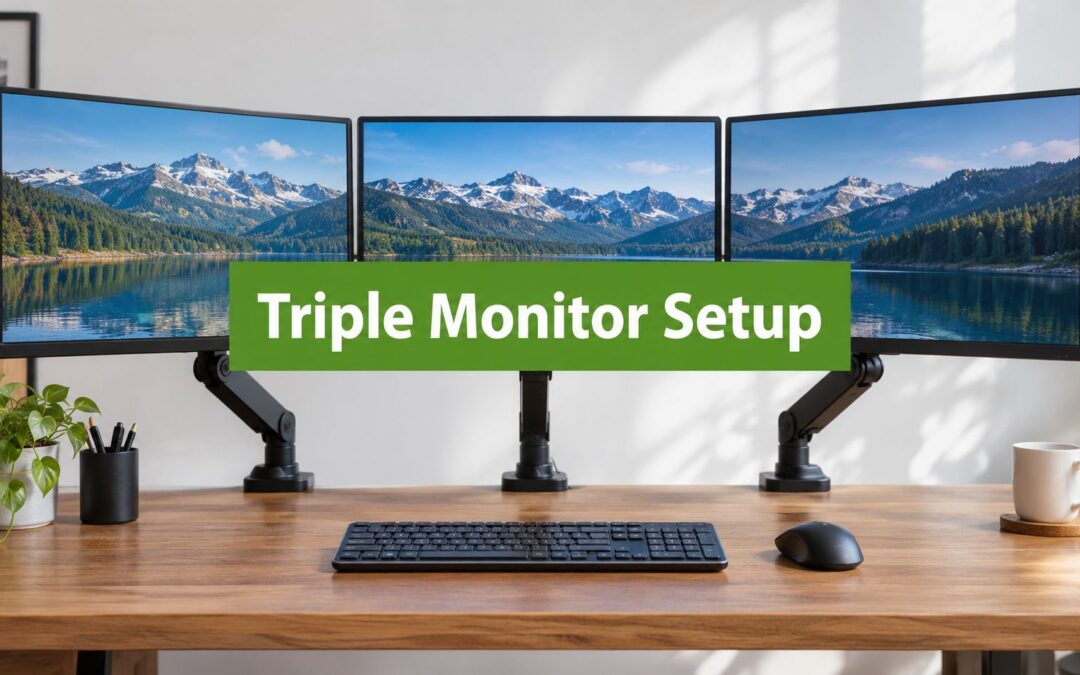
You know the call that starts with, “My laptop has three screens in the office, but at home I can only get two to wake up.” That's usually the main problem behind a triple monitor setup, not the monitors themselves. On Edmonton desks, the fail point is often the laptop, the dock, or the way the screens are stacked on the desk, and if the layout fights your neck, the extra display just becomes another thing to manage.
A third screen can fix a choppy day fast when each panel has a job. One screen holds the primary work, one carries reference material, and one stays open for mail, chat, or source data so you stop bouncing between windows. For a simple overview of the basic layout before you buy anything, simple monitor setup help is useful context, but the bigger win comes from matching the hardware and the desk to the way you work.
Table of Contents
- Why a Third Screen Changes the Workday
- Checking What Your PC or Laptop Can Actually Drive
- Choosing the Right Connection Path
- Mounting, Cabling, and the Physical Install
- Configuring Displays in Windows, macOS, and Linux
- Setting Up the Desk for Neck-Friendly Viewing
- Performance Tuning, Troubleshooting, and When to Call a Technician
Why a Third Screen Changes the Workday
An Edmonton accountant with spreadsheets open on one display, email on another, and a Teams call tucked into a corner knows the true tax on attention, constant window shuffling. A third screen ends that shuffle when the work is assigned a permanent home instead of living in overlapping windows. The shift feels small at first, then suddenly the desk is calmer because the eyes stop hunting for the next tab.
The benefit is strongest when the screens are doing different jobs. One panel should stay primary, one should hold supporting material, and one should stay available for communication or live reference data. If the third monitor matches the others in height, resolution direction, and panel behaviour, the layout feels like one workstation. If it doesn't, the extra panel can create more eye strain than it removes.
Practical rule: a third monitor helps when it reduces context switching, not when it simply adds another place to lose a window.
That's the same reason a clean triple monitor setup often feels better than a pile of maximised apps across two screens. The desk stops forcing the user to re-create the same layout every hour. In practice, that means fewer clicks, fewer head turns, and less mental friction during long sessions.
Canadian ergonomic guidance backs up the layout choice. The Canadian Centre for Occupational Health and Safety recommends arranging the screens by workflow, and Ontario's ergonomics guidance says the middle monitor should be the primary screen used most often. A case from hospital workflow research also showed a dual-monitor record-processing time drop from 19.83 to 18.73 minutes compared with a single monitor, which is a good reminder that the payoff comes from a tightly organised workflow, not just more pixels. CCOHS monitor positioning guidance and Ontario office screen guidance both point to the same conclusion.
Checking What Your PC or Laptop Can Actually Drive
Before any monitor comes out of the box, I check the graphics path first. On Windows, that means Device Manager, on macOS it's About This Mac and the Graphics/Displays report, and on Linux I'd start with lspci | grep -i vga. That tells you whether you're dealing with integrated graphics, a dedicated GPU, or a laptop that looks powerful on paper but can't push three external displays without help.
Then I list every physical output and its protocol. HDMI, DisplayPort, USB-C with Alt Mode, and Thunderbolt all behave differently, and the port label alone doesn't tell the whole story. A laptop with one USB-C port and one HDMI port can still be the wrong machine for three screens if the host limit is only two external displays or if the dock is splitting bandwidth in a way the marketing page never mentions.
Bandwidth matters more than people expect. 4K at 60 Hz over HDMI 2.0 is fine, while 4K at 120 Hz needs HDMI 2.1 or DisplayPort 1.4 with DSC. A lot of the mystery “monitor problem” tickets I see are really capacity problems, not defective panels.
| Port / Version | Max Practical Triple-Display Config | Notes |
|---|---|---|
| HDMI 2.0 | One display at 4K 60 Hz, or mixed lower-res trio | Fine for simple output, but not the best choice for demanding triples |
| HDMI 2.1 | Higher-bandwidth external display path | Better fit for newer high-refresh panels |
| DisplayPort 1.2 | Triple setup possible with careful resolution matching | MST can help if the rest of the chain supports it |
| DisplayPort 1.4 | Stronger candidate for multi-display use | Better headroom for demanding layouts |
| USB-C with Alt Mode | Depends on host capability and dock design | Often the first place laptop bottlenecks show up |
| Thunderbolt 3 or 4 | Best laptop-path candidate for a docked triple | Still needs certified compatibility, not just a pretty spec sheet |
That's why I always send clients to a specs check before any shopping. If you need a refresher on where those details live in the machine itself, how to check computer specs is the right place to start. For laptops, docks, and adapters, the definitive answer is usually in the certified compatibility list, not the big product headline.
Choosing the Right Connection Path
Direct GPU wiring is the most dependable route on a desktop. Each screen gets its own pipeline, there's no dock firmware to argue with, and the troubleshooting tree is shorter because the signal path is obvious. The limit is physical, if the card doesn't have the outputs, the setup doesn't happen.
A USB-C or Thunderbolt dock makes more sense on a laptop desk. One cable carries video, data, and often power, which is exactly why hot-desking and mixed home-office setups lean that way. The catch is bandwidth sharing, and that's where the spec sheet matters more than the sales copy. A dock may promise three screens and still only behave the way you expect under certain host configurations.
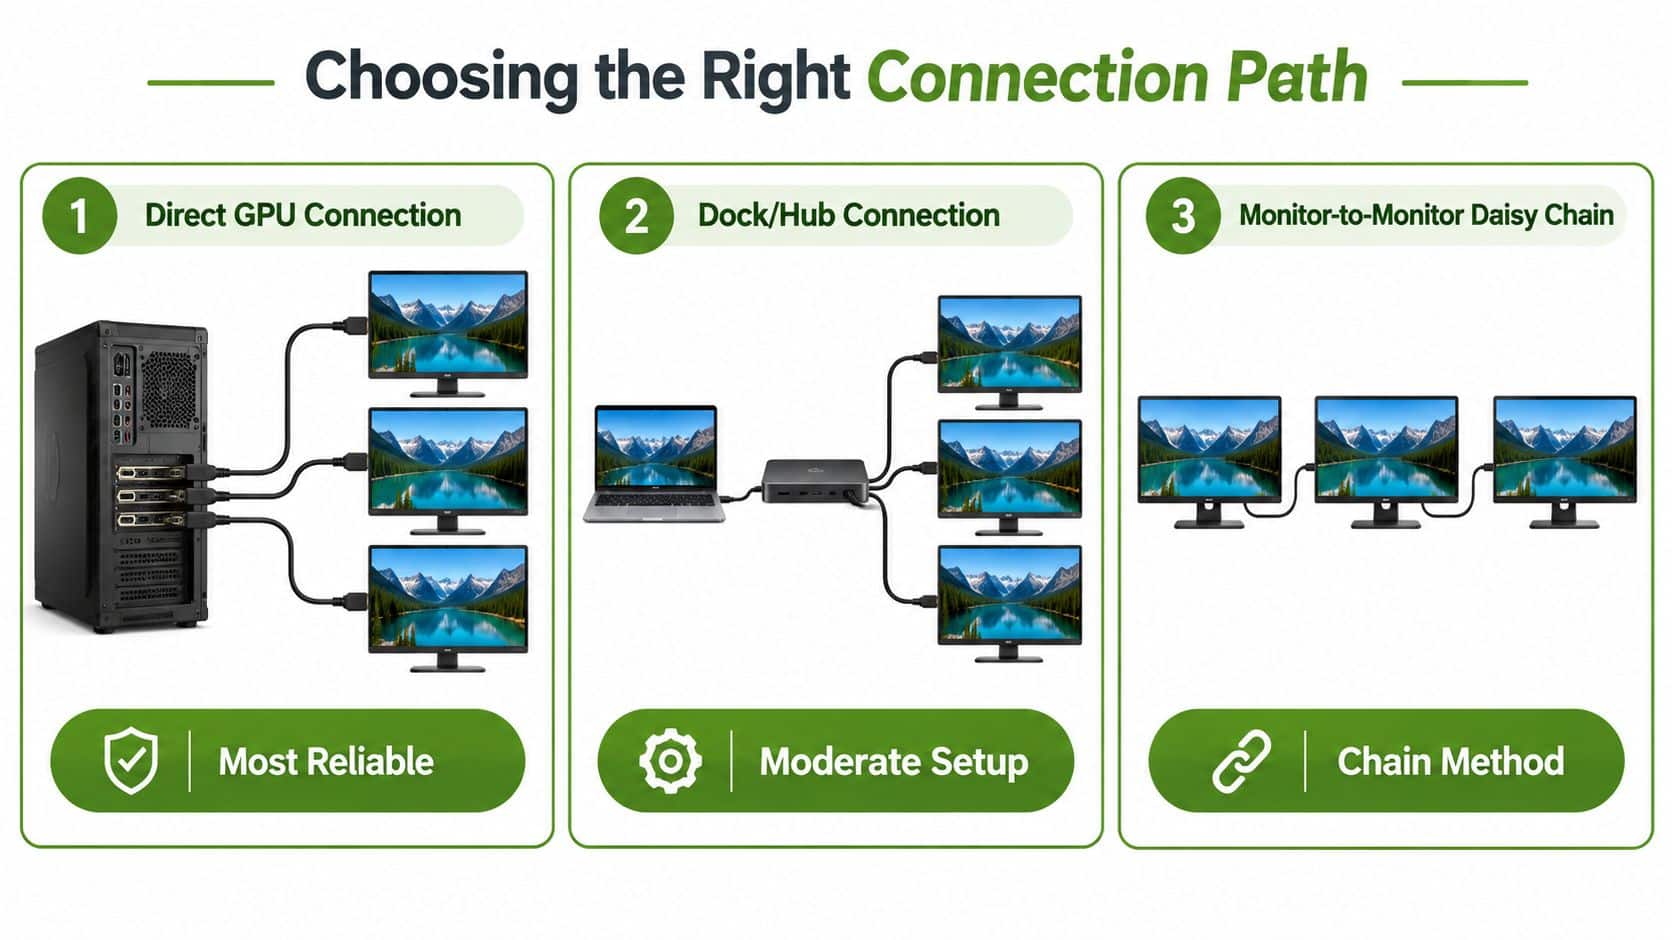
DisplayPort Multi-Stream Transport is the cleanest middle ground when the monitors and GPU support it. One output feeds monitor one, which passes the signal to monitor two, and sometimes to a third display if the chain and bandwidth are right. It simplifies cabling, but every link in the chain needs to play nicely, and the last screen has to offer a DP-out port.
If you need a deeper Thunderbolt-to-USB-C explanation before buying a dock, Thunderbolt to USB Type-C is worth reading once. I'd still make the decision the same way I do on site. A desktop with three matching panels usually wins on direct GPU connections. A laptop user who wants one-cable docking usually wins on a certified Thunderbolt dock. Mixed-brand monitors in a row often work best on daisy-chain, if both ends support it cleanly.
Mounting, Cabling, and the Physical Install
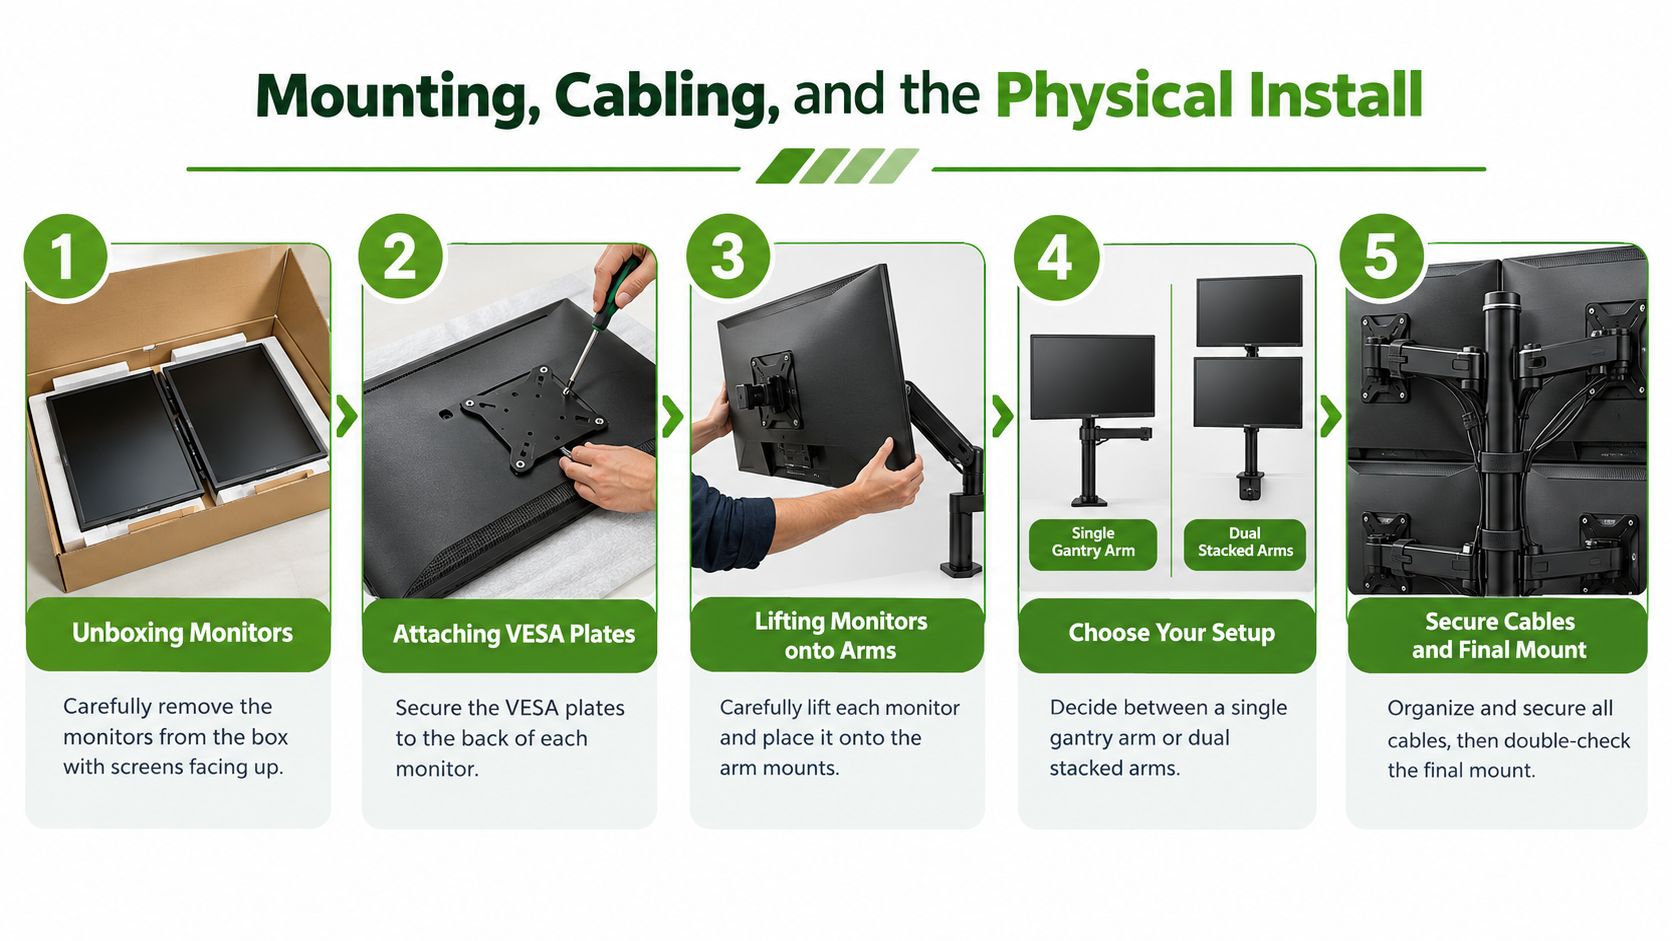
A clean triple monitor install starts before the first arm goes on the desk. Unbox the panels face up, attach the VESA plates first, and confirm the pattern on the back of each screen. Most displays use 75x75 or 100x100 mounting holes, and a mismatch there wastes time fast. I also check the desk underside before I clamp anything down, because a thin top or hollow edge will flex and make the whole row feel sloppy.
The physical order that saves the least grief
Start with the arms, then route the cables, then hang the panels. A single heavy triple-arm gantry works well on a deep desk with a centred load. Two stacked dual arms can be easier to balance on a table that flexes a bit. On a tight Edmonton home office, the wrong mount choice causes more trouble than the screen count itself.
Leave slack at every joint. If the arm can't swing without tugging the connector, the cabling is wrong.
That slack rule matters on every install I touch. I route DisplayPort or HDMI along the arm channels first, then USB-C and power, and I keep about 6 inches of slack at each moving point so the arm can travel without stressing the plug. The bundle goes through the grommet, the ends get labelled with masking tape, and only then do I tighten the cable ties. For the full laptop-to-monitor chain, see how to connect multiple monitors to a laptop, then route the runs the same way on site.
For cleaner cable routing around a shared home-office desk, desk cord setup for remote workers is a useful reference point. After the monitors are powered on, I verify orientation, then re-tension the joints once I know the row sits level. A full triple monitor setup looks right only when the weight, cable run, and arm geometry all work together.
Configuring Displays in Windows, macOS, and Linux
Windows 11 is straightforward once the physical layout is right. Open Settings > System > Display, click Identify, then drag the numbered tiles until they match the desk. Set the center panel as primary, choose Extend instead of Mirror, and set refresh rate and scaling per panel so a 4K middle screen doesn't shrink visually beside 1080p sides.
macOS is mostly a layout job. In System Settings > Displays, enable Arrange, match the on-screen order to the physical row, and keep the workspace behaviour sane by turning off automatic rearrange habits that fight your actual desk flow. The goal is simple, each display should act like a continuation of the same desktop, not a separate island.
Linux can be equally clean once you know the monitor names. On Ubuntu 24.04 or Fedora 40, open Settings > Displays, choose Join Displays or Separate Displays as needed, and use xrandr --listmonitors to confirm the names before locking the resolution. If the laptop lid stays closed on a dock, only then should the internal panel be disabled.
| Operating System | Path to Display Settings | Extend vs Mirror |
|---|---|---|
| Windows 11 | Settings > System > Display | Use Extend for a workspace that spans all three |
| macOS Ventura or later | System Settings > Displays | Use extended arrangement, not mirroring |
| Ubuntu 24.04 | Settings > Displays | Choose Join Displays for one wide desktop |
| Fedora 40 | Settings > Displays | Choose Join Displays for one wide desktop |
The main habit that saves time is checking the OS while seated at the keyboard, not standing at the desk and guessing. A screen that looks fine in the abstract can still be wrong when the chair, keyboard, and sightline are all in play. That's the difference between a display layout and a usable workstation.
Setting Up the Desk for Neck-Friendly Viewing
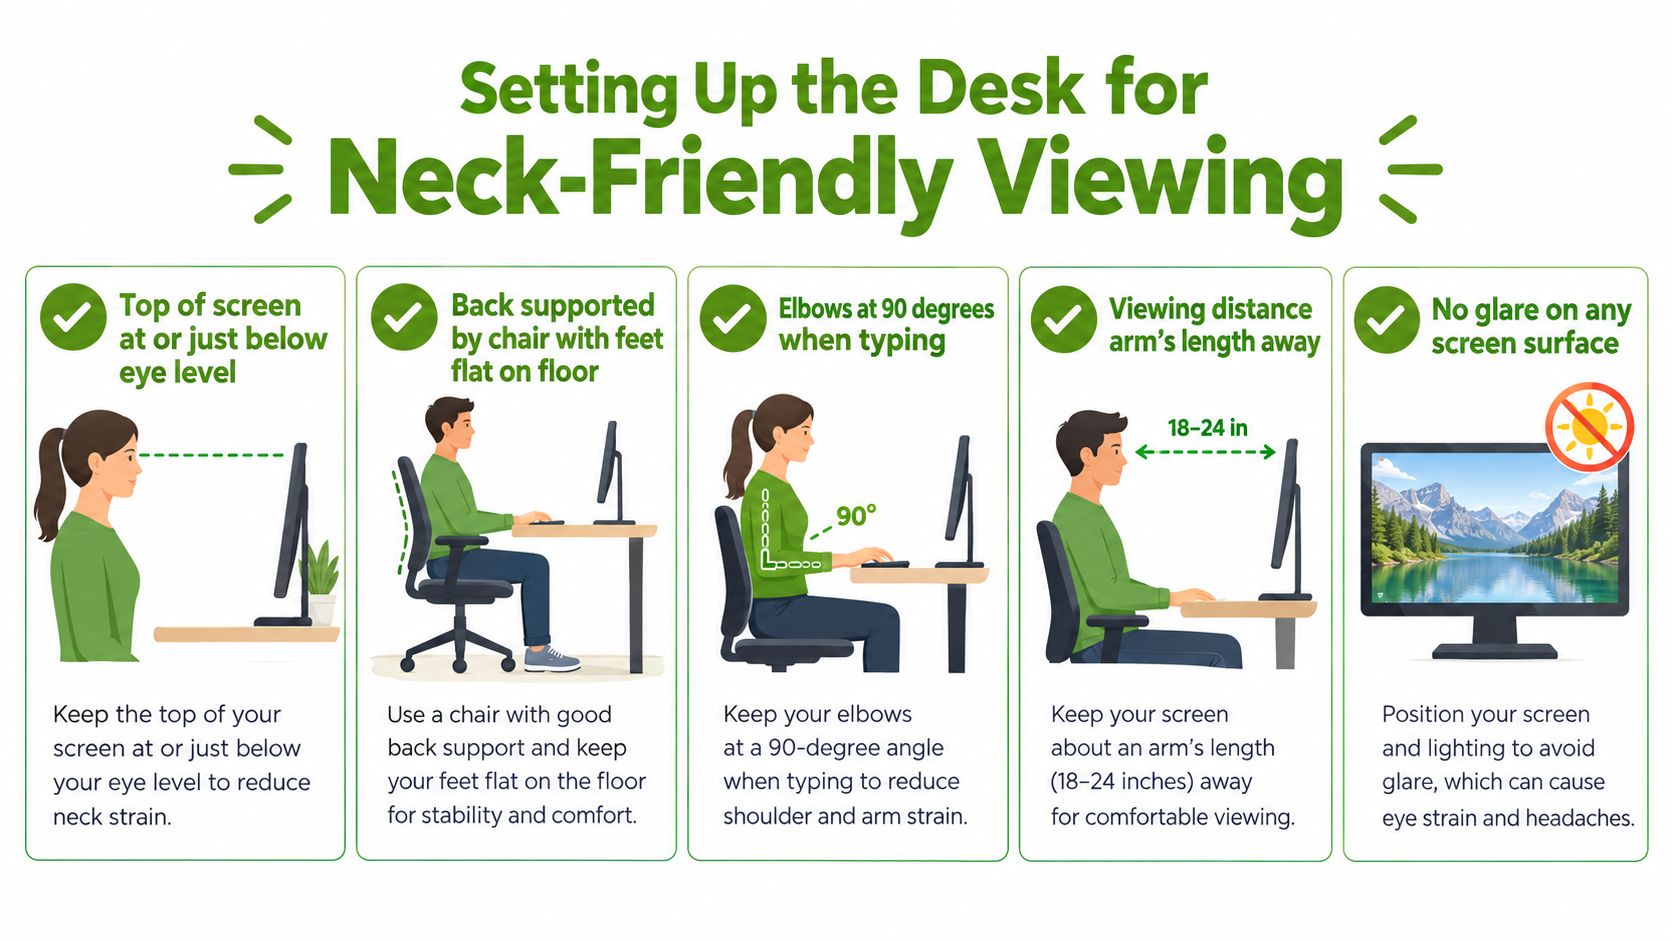
The easiest ergonomic check is also the one people skip. Sit back in the chair, plant your feet, and look at the top edge of every monitor, it should sit at or just below eye level. The center display belongs directly in front of you, and the side panels should angle inward so you're not twisting your neck all day.
The Canadian guidance is clear about the viewing cone. CCOHS says the screens should stay about an arm's length away, with the top of the screen at eye level or slightly below if corrective lenses are used, and Ontario's ergonomics guidance says the middle monitor should be the one used most often. If the side monitor needs regular shoulder rotation to read comfortably, the arc is too wide or the screens are too close. That rule catches bad installs faster than any software tool.
The seated test that tells the truth
A desk depth of at least 30 inches makes the whole arrangement easier to live with. On shallower desks, a floating arm mount can still work, but the keyboard and mouse need to stay compact or the front edge becomes a pile-up point. If the desk is narrower than that, I'd rather solve the geometry with the arm position than force the user into a bad sitting distance.
Lighting is the other piece that gets ignored until winter hits. Put the panels perpendicular to windows so glare doesn't land straight on the glass, and use soft rear-wall bias lighting to keep the room from feeling cave-dark during long evenings. For posture support beyond the screens themselves, pain relief posture guide is a solid companion read.
A good triple setup should disappear into the work. If you notice the screens more than the task, the layout still needs tuning.
That's why I also like floating the panels above the desktop with arms instead of letting the stands eat the whole work surface. When the keyboard, mouse, and forearms all sit naturally, the setup feels more stable and less fussy. For people thinking about a sit-stand desk later, the broader ergonomics case is worth comparing with standing desk benefits, but the basic neck-friendly rule stays the same.
Performance Tuning, Troubleshooting, and When to Call a Technician
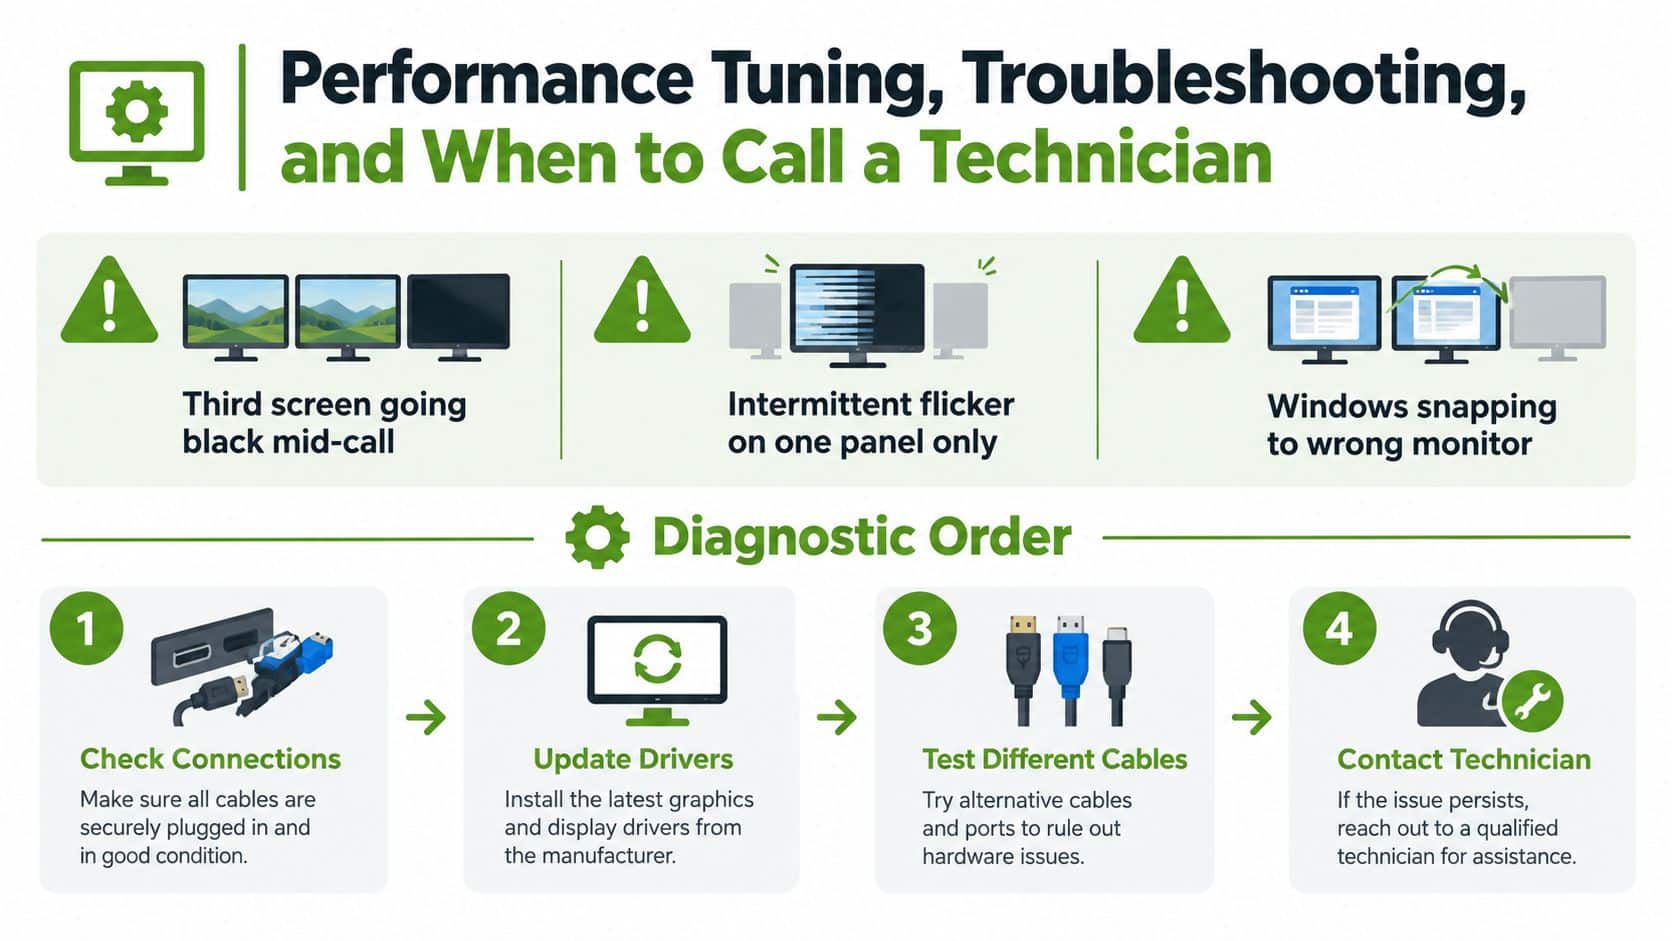
A triple setup usually starts failing in the same way, one screen goes black mid-call, one panel flickers, or Windows snaps a window to the wrong monitor. I work the problem in a fixed order, GPU output first, cable second, driver third, OS configuration last. That sequence cuts through guesswork because it separates signal failures from layout mistakes.
There are a few fixes that help. Matching refresh rates across the three screens reduces weirdness, and mismatched adaptive-sync features can cause extra instability, so I'll disable Freesync or G-Sync on mixed panels when needed. I also update GPU drivers from the manufacturer, not Windows Update, because the driver package usually matters more than the generic inbox version.
Signs the issue is hardware, not settings
A port that works with one cable but not another points straight at hardware or connector wear. Persistent black screens after sleep, dock-specific failures that survive driver resets, and a display that only behaves after a full power cycle are all stronger signs than a bad Windows layout. Monitor identity caches can also confuse colour profiles, so I clear those when the OS insists on remembering the wrong panel.
There's also a practical buying rule that saves a return. If the laptop or dock only behaves at the edge of its spec sheet, don't build the workstation around hope. That's where a local technician earns their keep, especially when dock firmware quirks show up on business laptops or when the mount has to be installed in a way that won't risk the hardware warranty.
If a cable run disappears through a wall or desk, test everything before final routing. Hidden cabling turns a five-minute fix into a half-day one.
For small offices, this work is often best handled as part of ongoing support instead of a one-off scramble every time a screen drops. Multi-monitor workstation support fits naturally into managed IT for teams that want recurring issues handled by someone on call. The setup itself is simple when the pieces match, and stubborn when one link doesn't.
If your Edmonton desk keeps fighting you, Nerds 2 You Edmonton can help sort the laptop, dock, mounts, cables, and display settings on site so the setup works the way it should. If you want a practical triple monitor setup that's stable, ergonomic, and reliable for home or small-business use, visit Nerds 2 You Edmonton and book the kind of hands-on help that gets the job done right the first time.
Contact Nerds 2 You for quality professional service
Experience the difference with our dedicated team of experts ready to assist you. Whether you need immediate support or have questions about our services, we are here to help. Reach out today and let us provide you with the reliable service you deserve. Your satisfaction is our priority and we guarantee a prompt response to all inquiries.
Discover more from Nerds 2 You
Subscribe to get the latest posts sent to your email.