

You've got a timeline open, a 4K clip on one screen, and a second monitor full of bins, scopes, and browser tabs. The export looks fine at a glance, but when you scrub frame by frame, the image feels softer than it should, the text is cramped, and every port on the back of the new display seems to speak a different language. That's the moment when panel comparisons begin, only to realise that a 4K monitor for video editing is really a workflow decision, not just a screen upgrade.
A good editing display has to balance sharpness, colour accuracy, connectivity, and calibration. If one of those pieces is off, you can still edit, but you'll work harder and second-guess more. For editors in Edmonton, the setup question gets even more practical, because local on-site help can remove the friction of cable chasing, calibration mistakes, and monitor placement before they interrupt real work.
Table of Contents
Introduction to Choosing a 4K Editing Monitor
A new monitor can look impressive on a sales floor and still feel awkward on your desk. The first mistake is chasing a glossy label before checking the parts that shape real editing work, resolution, colour gamut, bit depth, panel type, and ports. A 4K editing monitor earns its place only when it helps you judge focus, framing, skin tones, and shadow detail without second-guessing every frame.
Start with the footage you actually edit
If most of your delivery is 4K, the display has a straightforward job. It should show that footage at native size without forcing your interface to blur details or hide them behind scaling tricks. A 4K screen gives you the space to keep the image clear while still leaving room for timelines, bins, and scopes, which is why it is often recommended for precise editing and for exporting crisp 4K video (ScreenResolutionDB).
That extra density matters because editing is different from gaming or office work. You are not just watching the picture, you are checking it frame by frame. You need enough detail to judge an edit, but not so much interface clutter that the screen becomes hard to read.
Practical rule: choose for the footage you finish most often, not the biggest file that showed up in your inbox last week.
Treat the display as part of the editing chain
A monitor is one link in a longer chain that includes the machine, the cable, the software, and the room lighting. If any one of those is weak, the picture you see can drift away from the picture you meant to create. Lenovo's editor-focused guidance points toward IPS panels, wide-gamut colour support, calibration, and reliable workstation connectivity rather than gaming-first specs (Lenovo).
That is why local setup matters. A monitor that looks fine in the store can behave differently on your desk, especially when you are using a laptop dock, a second display, and a colour-managed editing app at the same time. Edmonton editors who want less trial and error benefit from on-site support, because the screen can be placed, connected, and checked in the same room where the work happens.
Understanding Key 4K Monitor Specs
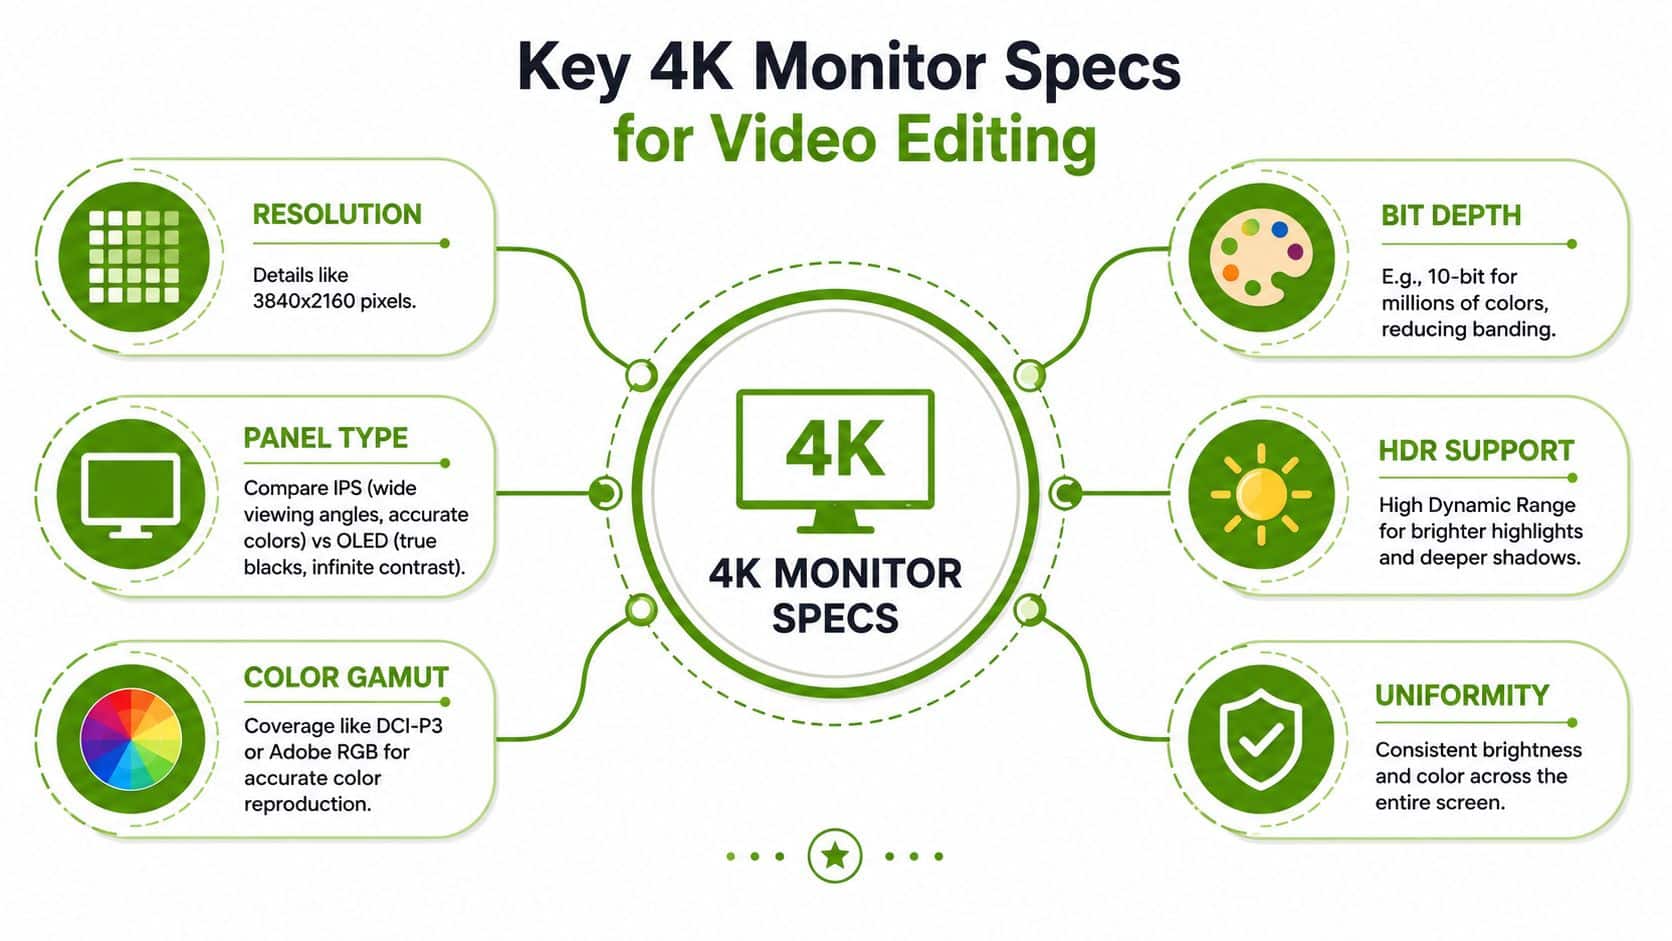
A good spec sheet is easier to read if you ask a simple question about each line item, what does it do for the image on your desk? Resolution tells you how much detail the screen can show, panel type affects how that detail looks from different angles, and colour gamut defines how much of the footage's colour range the monitor can display. Those parts work together, but they do different jobs.
Resolution and pixel density
The starting point is 3840 × 2160 resolution. That gives you roughly 8.29 million pixels, which is four times Full HD, so the image has enough detail for careful editing and for exporting crisp 4K video without the screen itself becoming the weak link. On a 27-inch panel, the resulting 163.18 PPI keeps timeline labels and menu text sharp enough to read comfortably while you are trimming shots and checking fine edges.
The practical payoff is easy to feel. Footage stays cleaner at the edges, and the editing interface can sit beside the picture without crowding it. If you are moving up from a lower-resolution display, the change often feels less like a spec upgrade and more like the squinting stops.
Panel type, colour gamut, and bit depth
IPS and OLED solve different problems. IPS usually gives stable viewing angles and predictable colour, while OLED brings deeper blacks and stronger contrast. For editing, the question is which screen helps you trust the image when you shift in your chair, compare shots from the side, or inspect a dark scene in a dim room.
Colour gamut and bit depth come next. Editing guidance often points toward wide-gamut coverage such as DCI-P3 or Adobe RGB and 10-bit support, because that helps reduce colour clipping in saturated footage and lowers the chance of visible banding while you grade (fFotografosShop). One tested model, the ASUS ProArt PA279CRV, was reported with 99% DCI-P3, Calman Verified accuracy, and 96W USB-C power delivery (fFotografosShop).
Wide gamut still needs accuracy. A monitor can show a lot of colour and still show the wrong colour, which is why colour claims should be checked against real calibration results instead of marketing language alone.
HDR and uniformity
HDR causes confusion because the label can sound more capable than the panel really is. A screen marked “HDR” may still fall short for grading if it cannot hold bright highlights and dark shadow detail at the same time. One buying guide says a serious editing display should use VESA DisplayHDR 600 or higher for true HDR, with 95%+ DCI-P3 and Delta E ≤ 2 factory-calibrated accuracy (Wellfizz).
Uniformity matters just as much, even though it gets less attention in product ads. If one corner is brighter than another, you end up second-guessing shots that should already feel settled. A dependable 4K monitor for video editing is judged by how evenly it behaves across the whole panel, not only by its headline resolution or HDR label.
A monitor also has to fit the rest of the desk. If you are using a laptop, a dock, and a second screen, how to connect multiple monitors to a laptop becomes part of the buying decision, because the right ports and signal path affect whether the display performs as expected. That matters just as much in Mac and PC setups, where adapter choices, scaling behaviour, and cable quality can change how cleanly the image reaches the screen. Edmonton editors who want less trial and error often benefit from on-site setup and calibration, because the screen can be connected, checked, and adjusted in the same room where the work gets done.
Considering Workflow and System Setup
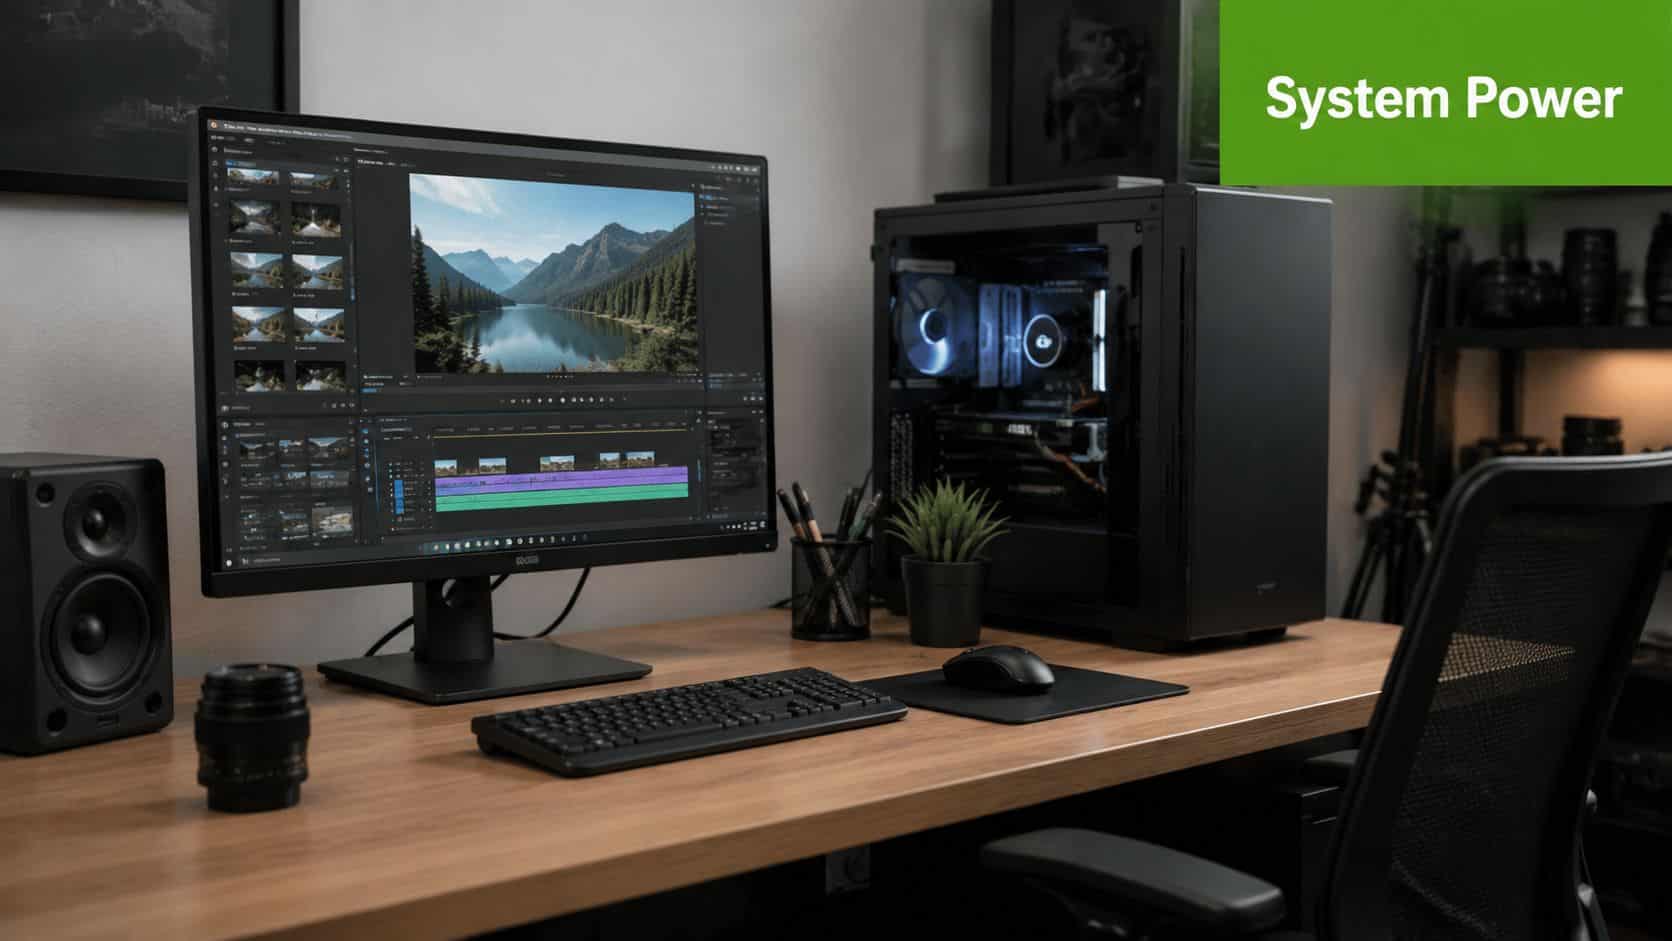
A 4K monitor for video editing only shows its value when the rest of the editing chain can keep up. If playback stutters, proxies are missing, or memory runs thin, the screen gets blamed for problems that began earlier in the pipeline. In practice, the monitor and the workstation need to match each other, or every timeline move feels slower than it should.
Know the floor before you chase the ceiling
A standard reference for 4K editing lists minimum offline editing requirements of an Intel Core i7 2.3GHz four-core CPU and 8GB RAM, while online editing calls for dual Intel Xeon 2GHz six-core CPUs and 32GB RAM (VideoMaker). The same reference estimates that a full 4K-editing setup could rise to about $6,500 (VideoMaker).
Those figures are useful because they show where the monitor sits in the larger spend. A sharper display cannot repair a weak workstation, just as a wide lens cannot fix a shaky tripod. If your system is already capable, the monitor helps you see the footage more clearly. If the machine is underpowered, the screen only makes the delay more obvious.
A practical rule is to budget for the full chain, not just the panel. Storage speed, RAM, graphics support, and cable quality all shape how smoothly a 4K edit session runs, especially once you add external drives, docks, and a second display. That is why a display decision belongs in the same conversation as workstation planning, not after it.
Mac and PC need different habits
Mac and PC setups can both handle editing, but they often ask for different habits at the desk. Macs usually work cleanly through Thunderbolt docks, while PC rigs tend to make port selection, adapter choice, and cable planning more visible. The lesson is the same on both platforms, the display path should be simple enough that it does not become another point of failure.
For a clean multi-screen layout, this guide to connecting multiple monitors to a laptop is useful if your editing station moves between home, office, or client rooms. That matters because every added adapter, dock, or converter is another place where resolution, refresh behavior, or scaling can change before the image reaches the panel.
A similar planning step applies to software choices. The right app can reduce friction in exports, color work, and review, and these software recommendations for YouTube growth help place the monitor inside the larger editing stack without forcing one workflow on everyone.
Match the monitor to the workflow
A good edit bay keeps the UI, preview, and output under control at the same time. That usually means enough sharpness for text, enough colour quality for grading, and enough input flexibility to survive docking, switching, and client review sessions. If your setup changes from project to project, the best monitor is often the one that stays out of the way and lets the rest of the station do its job.
Edmonton editors also have a local advantage that many buying guides skip. On-site setup and calibration can save time because the screen is connected, checked, and adjusted in the same room where the work happens. That matters when you want the monitor, the computer, and the room lighting to agree before a project starts, instead of discovering the mismatch after hours of test renders.
Calibrating and Profiling Your Monitor
Factory settings rarely match the room you edit in. A spare bedroom, basement office, or shared studio can all change how shadows, neutrals, and skin tones appear, so calibration is not a polish step at the end. It is the part that makes a good screen behave like a dependable one while you grade, cut, and review.
Follow a simple calibration sequence
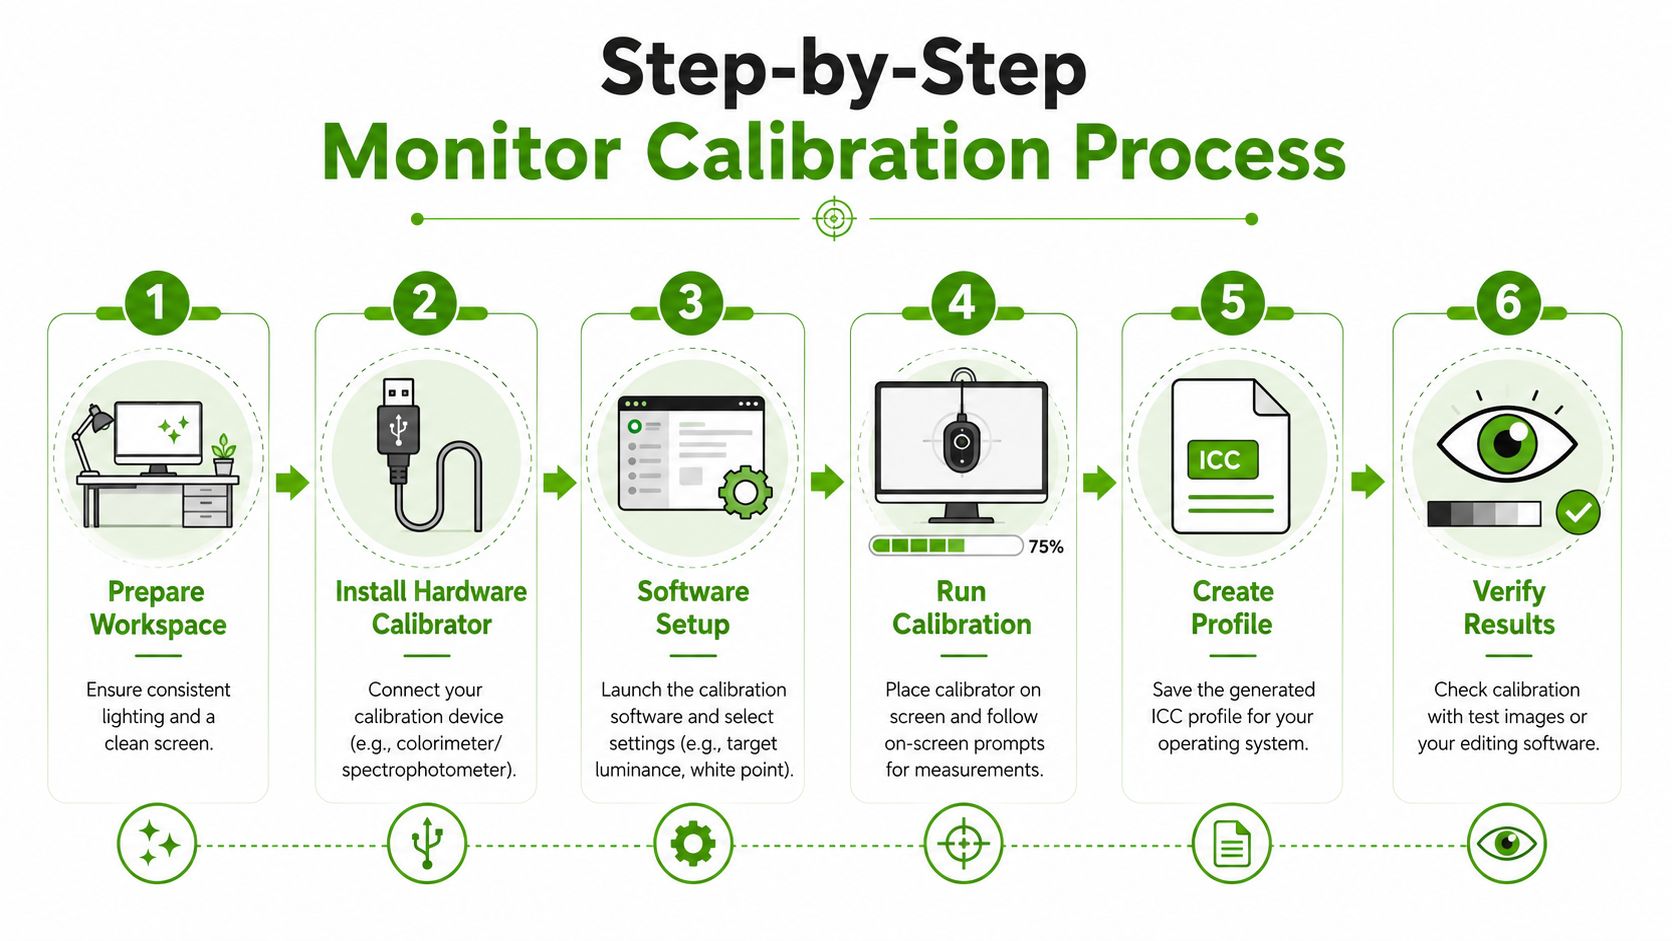
Start with the room itself. Keep the lighting steady, avoid direct glare, and clean the screen first, because dust and shifting lamp light can skew your judgement before any software runs. Then connect a hardware calibrator, let the calibration software measure the display, build an ICC profile, and confirm the result with a few test images.
The process matters because it ties your setup to what your eyes see, not to the monitor's factory assumptions. A screen that looks “good enough” on first boot can still drift in shadows or white balance once it lands in a real edit bay.
The goal is not a fancy settings menu. The goal is a screen you stop arguing with.
A professional buying guide says ideal 2026 editing displays use 4K IPS or OLED panels with 95%+ DCI-P3 coverage, Delta E ≤ 2 factory-calibrated accuracy, and VESA DisplayHDR 600 or higher for true HDR (Wellfizz). That target is useful because it keeps the discussion anchored to measurable output instead of vague “vivid” promises.
Make the profile match the project
A calibration profile should fit the job in front of you. Web delivery, client review, and finishing for different screens all place different demands on the monitor, even if the panel itself does not change. A profile that behaves well in one room can feel wrong in another if the lighting shifts or the viewing angle changes.
Mac and PC setups can also complicate the profile in ways beginners do not expect. A dock, adapter, or operating system update can change how the display is seen, which is why a screen that suddenly looks off may need more than a quick settings tweak. If the monitor ever seems disconnected from the computer, this guide to monitor not detected troubleshooting can help you sort out the connection before assuming the panel has failed.
Edmonton on-site checklist
Use this for a clean first setup in Edmonton.
-
Control the light: keep lamps and window glare stable before calibration starts.
-
Seat the monitor correctly: place the display at a comfortable height before profiling.
-
Check the cable path: confirm the signal cable is seated firmly at both ends.
-
Run the calibrator on the intended input: calibrating the wrong source wastes time.
-
Save the profile clearly: name it in a way you'll recognise later.
-
Verify with real footage: open a familiar timeline and inspect skin tones, shadows, and neutrals.
This is also where local on-site calibration services earn their value. A technician can check the screen, cable, computer, and room lighting in the same place where you edit, which is faster than guessing at home and then chasing the same problem again after a render. In Edmonton, that kind of hands-on setup can reveal a bad cable, the wrong input mode, or a lighting issue before it becomes a distraction during client work.
Comparing Budget Tiers and Trade Offs
Price shapes the monitor decision as much as panel quality does. A lot of people want “the best” until they see the difference between a consumer screen, a serious mid-range model, and a professional display built for colour work. The smart move is not to buy the most expensive one, it's to buy the one that fits your editing reality.
| Tier | Price Range | Colour Gamut | Bit Depth | USB-C Power Delivery |
|---|---|---|---|---|
| Entry level | Around $300 | Typically narrower than pro models | Varies by model | Often missing |
| Mid range | Around the middle of the market | Better creator-focused coverage | More likely to support stronger colour handling | Often included on select models |
| Professional | Starts around $1,200 and rises much higher | May add 99% DCI-P3 | May include true 10-bit support | May include 96W USB-C |
Creative Bloq notes that decent consumer 4K displays can be found for around $300, while professional models start around $1,200 and rise much higher as they add 99% DCI-P3, Calman verification, 96W USB-C, and true 10-bit support (Creative Bloq). That price gap matters because the lower tier often covers basic sharpness, while the higher tier starts solving colour management and laptop docking at the same time.
Entry level suits simple editing, not colour-critical grading
At the entry level, you're mostly paying for 4K sharpness and usable size. That can be enough for YouTube cuts, rough client review, and general content creation if you're not demanding exacting colour work. The compromise is usually in gamut coverage, calibration confidence, and connectivity.
For a novice editor, this tier can still be sensible. You learn the interface, see your footage clearly, and keep costs down. The trade-off is that you're more likely to outgrow it when your projects start needing tighter grading or more reliable colour matching across devices.
Mid range is the practical sweet spot for many editors
Mid-range displays usually feel like the point where the screen stops asking for apologies. They often bring better factory tuning, stronger colour support, and more flexible ports, without jumping into the premium bracket. If you're editing regularly but not doing broadcast-level work every day, many editors find these displays suitable.
Best value often lives here: enough accuracy to trust, enough connectivity to avoid constant dongles, and less regret when the invoice arrives.
Professional displays pay for confidence
Professional models justify themselves through consistency. Features such as Calman verification, stronger colour coverage, and better USB-C power delivery reduce friction in studios and on-location work. They don't just look good in a showroom, they reduce the number of times you have to wonder whether the screen is lying to you.
If your work depends on colour trust, the upgrade can make sense. If your output is mostly fast-turnaround social video, you may never use every premium feature, and that's fine. The important thing is to avoid buying into specs you'll never notice while editing.
Ensuring Connectivity Scaling and Edmonton On Site Services
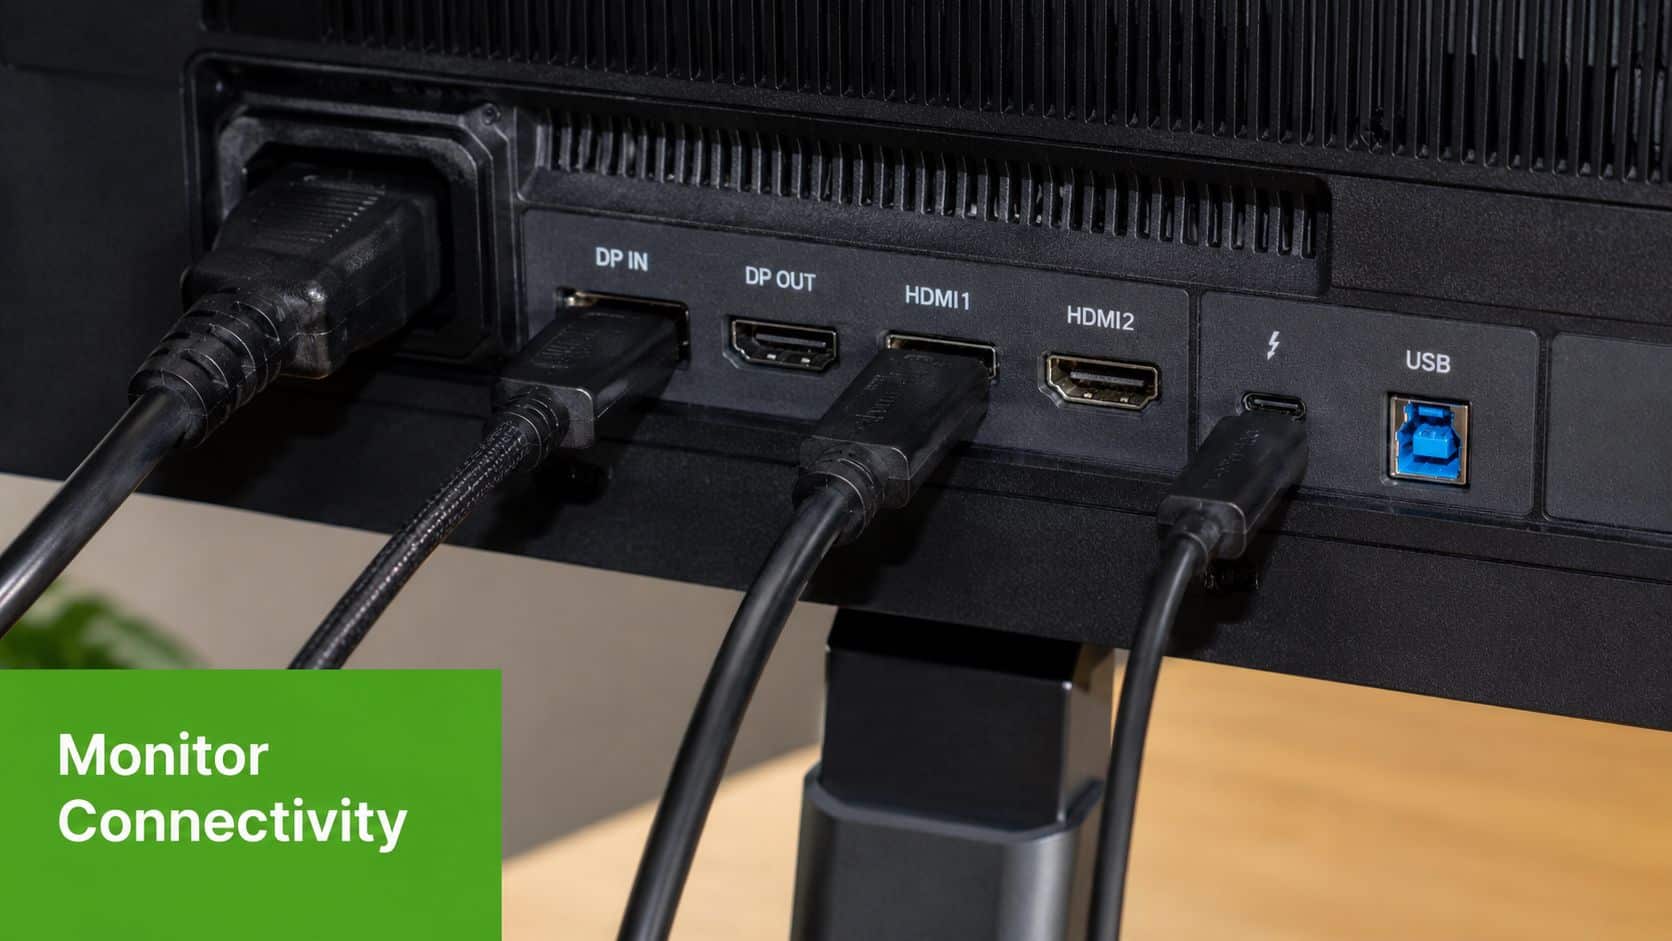
A monitor can have excellent image quality and still be miserable to live with if the ports and adapters don't line up. That's especially true in mixed Mac and PC environments, where one desk might use Thunderbolt docking and another might rely on DisplayPort or HDMI. The cleanest setup is the one that keeps the signal path short and the desk easy to reconfigure.
Choose ports with the whole desk in mind
For editing, the port choice is really a scaling choice. If you expect to add another display, switch laptops, or dock and undock frequently, you want connections that stay reliable under those changes. That's why editors often pay attention to the rear panel as much as the front image.
If you're sorting out a Thunderbolt setup, this guide to Thunderbolt to USB Type C can help you avoid the most common compatibility confusion. It's especially useful when one cable is supposed to carry display, power, and peripherals at the same time.
Why local support matters in Edmonton
Canadian editors often find that calibration and profiling matter more than resolution alone once the display gets beyond 1440p, especially for web, broadcast, and client workflows (Scan). That lines up with a practical reality in Edmonton, setup quality matters more when the screen is being used for real client work, not just general computing.
If you're evaluating IT support for a small studio or a home office, how to select business IT support is useful background reading because it shows the difference between reactive help and proper planning. In the same way, monitor setup benefits from someone who can place the display, check the cables, and confirm the profile in the room where you'll be editing.
What on-site service should and shouldn't mean
On-site help should make the setup smoother, not more mysterious. For this kind of work, the value is in hands-on installation, network monitoring, and ongoing support where needed, while not pretending to be a remote-first or full MSP replacement. That distinction matters because monitor work often overlaps with laptop docking, network stability, and file transfers.
If a screen keeps disconnecting, the issue may be the cable chain, the adapter, or the desk layout rather than the panel itself. Having someone physically there shortens the guesswork and leaves you with a workstation that feels stable, which is what a 4K monitor for video editing is supposed to deliver in the first place.
Conclusion and Next Steps
A solid 4K monitor for video editing is the one that fits your footage, your machine, and your room. Start with resolution and pixel density, then check colour gamut, bit depth, panel type, and calibration support. After that, match the screen to your actual workflow, because a display that's excellent on paper can still be inconvenient on your desk if the connectivity or setup is wrong.
The most useful next move is simple. Define your editing priorities, compare the budget tier that fits them, and calibrate the display in the same environment where you'll use it most. If you're in Edmonton and want the setup handled cleanly on-site, Nerds 2 You can help with installation, calibration, and ongoing support so you spend less time wrestling with the desk and more time finishing the edit.
Contact Nerds 2 You for quality professional service
Experience the difference with our dedicated team of experts ready to assist you. Whether you need immediate support or have questions about our services, we are here to help. Reach out today and let us provide you with the reliable service you deserve. Your satisfaction is our priority and we guarantee a prompt response to all inquiries.
Discover more from Nerds 2 You
Subscribe to get the latest posts sent to your email.